We teach clients how to manage their professional image libraries using a combination of Adobe Lightroom and Bridge. I typically don’t recommend iPhoto for most professional libraries.
Then Apple added Faces (facial recognition) in the latest version of iPhoto. I’m loath to give up my professional workflows, but easily keywording photo libraries with people’s names is a game changer for many businesses.
This week I started testing Picasa 3.5, free software from Google, which now includes face-matching. It works great, integrates easily with Lightroom or Bridge, and did I mention it’s free?
Download a Free copy of Picasa 3.5.
Picasa is free photo editing software from Google. I haven’t worked with the previous versions, however the latest version, Picasa 3.5, adds powerful new facial recognition features, which is what attracted my interest this time around. You can download Mac or Windows versions:
Download: Picasa 3.5 for Mac.
Download: Picasa 3.5 for Windows.
Step 1. Launch Picasa the First Time.
The first time you launch Picasa, a dialog box announces that Picasa is ready to search your computer for photos. This dialog nicely sums up Picasa’s strengths and weaknesses for our purposes.
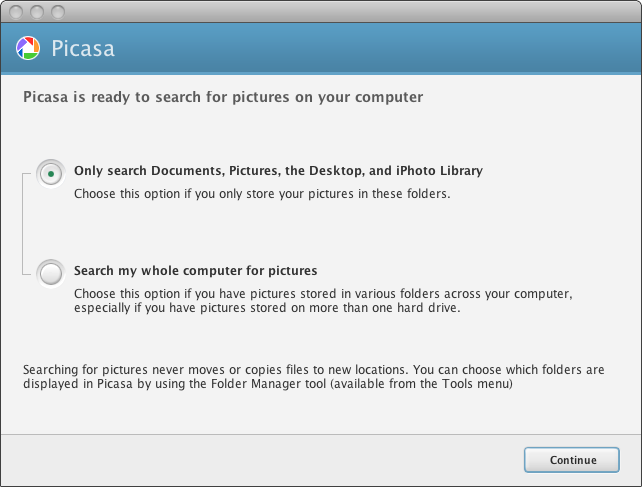
Strengths: Picasa doesn’t move or copy your image files. You’ll be able to easily add new keyword metadata without upsetting your current file management system.
Weaknesses: Picasa makes it difficult to work on a specific photo library. The default options of searching default user folders or everything is terrible. We’ll get into that in Step 2.
Step 2. Use Folder Manager to target specific folders.
In Picasa, choose Tools > Folder Manager. This is where you tell Picasa which folder to scan for photos, and which to ignore.
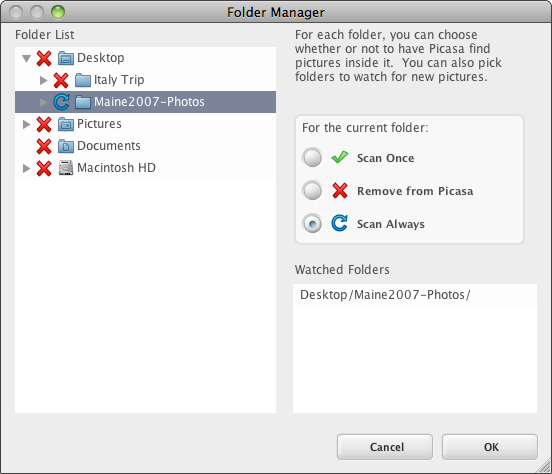
We’re using Picasa to augment existing photo libraries, so you may have to do a little digging in this dialog box. In this example I’ve disabled all the folders except for the specific collection I am interested in.
Step 3. Wait for Picasa to scan your photos for People.
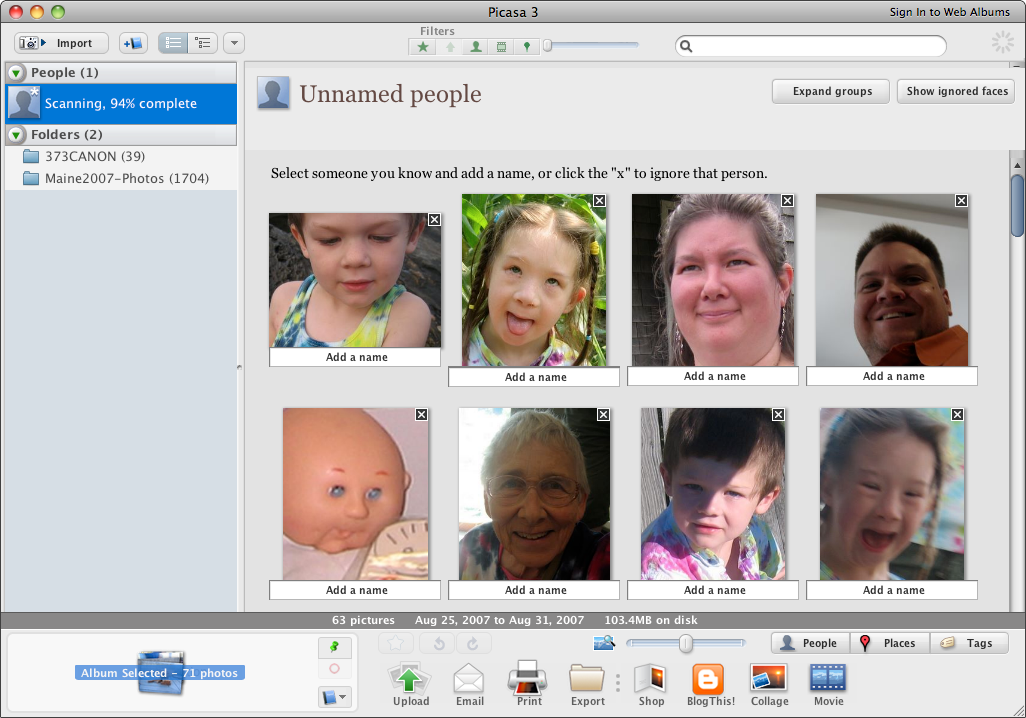
This will take a while. To demonstrate this tip I used a folder of family photos from our trip to Maine in 2007. Picasa took about 1 hour to scan 1,711 photos (about 4GB of disk space). Bigger collections take longer.
“Enable Face Detection” is turned on by default. You can find options for that in preferences under the “Name Tags” tab.
Note: Yes, we do take a lot of family photos!
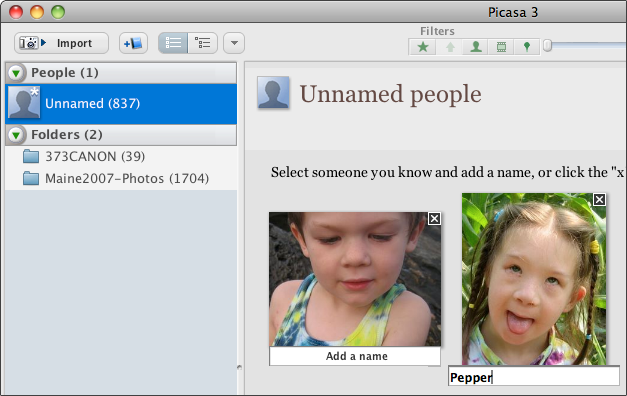
Step 4. Start Identifying People’s Faces.
This is the fun and time consuming part. Picasa automates and streamlines the face-matching process. Here is the short version. Click on “Unnamed” under the People tab, pick a face, and start naming.
I can’t turn this tip into a detailed Picasa tutorial, so I recommend reading Google’s help files for more details.
Help Files: Adding Name Tags in Picasa.
My biggest time-saving tip is that you’ll end up identifying the same people again and again. Once you’ve started naming a few faces, you can select multiple photos of the same person in the Unnamed list and drag them over to the correct name. Saves a lot of time.
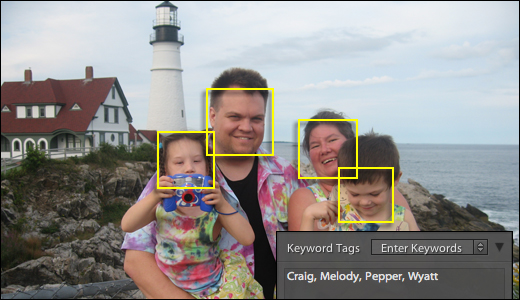
Step 5. Add People’s Names as Tags.
You just finished identifying everyone’s name right? But Picasa doesn’t embed that information in the metadata of your files. The goal this tip to get those names into your keyword lists to Lightroom or Bridge, so we need to add this extra step.

First, display the Tags palette by choosing View > Tags.
Under the People list, click each name one at a time and select all the photos in that set (Command-A on the Mac). Then in the tags column on the right, add a Tag with that person’s name. As you work, those tags are automatically added to the original image file metadata.
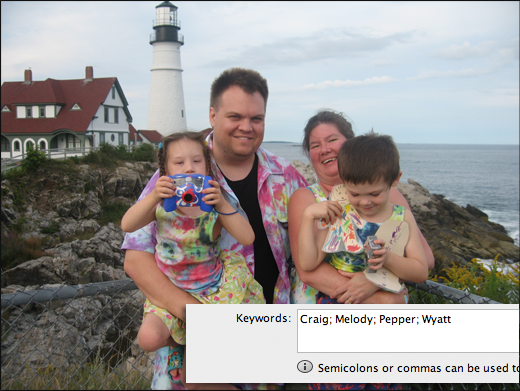
Step 6. Names are now embedded in image metadata!
Your work is done! The name tags are now embedded in the metadata of each of your photos. Which means they should be visible in Adobe Bridge, Photoshop or other image management tools. (Read below for an extra detail for incorporating this technique into Adobe Lightroom).
Bonus: Using this technique with Lightroom!
Unlike Bridge, Lightroom will not automatically recognize these metadata changes in your image library. If we wanted to use a tool like Picasa to quickly run facial recognition on a collection of photos, here is the process you should use:
Before Using Picasa: Select all the photos in your library, and choose Metadata > Save Metadata To File. (This writes any metadata changes from Lightroom back to the original files).
After Using Picasa: Now, back in Lightroom, select all the photos in your library again, and choose Metadata > Read Metadata From File. (This imports all your new name keywords into your Lightroom database.
Enjoy!
 Source: This tip was inspired by the 10-Week Lightroom Course that Steve Laskevitch is currently leading in our live, worldwide classroom. In fact, in today’s class Steve is digging into keywording in Lightroom, and we just might throw in a live demonstration of this tip in action!