Ever wanted to jump to a particular folder on your Mac while opening or saving a file? You can, thanks to a clever Finder trick. Whenever you have an Open or Save dialog open in an app, switch to the Finder, find the folder you want to access, and drag its icon into the dialog. Presto—instant navigation to that folder! This trick even works if you drag the proxy icon—the little icon in the title bar of any window—for any folder.
The Backup Triple Play that Can Save the Day
As much as we hate to admit it, when it comes to losing data, the question is not “if,” but “when.” If you rely on your Mac for your job, or if your Mac contains valuable information—and whose Mac doesn’t have at least irreplaceable photos?—you must back up regularly or risk data loss. Seriously, full backups of your entire Mac are not optional.
Backups protect your data and help you get back to work more quickly if your Mac is lost, stolen, dropped on the floor, caught in a fire, soaked by a broken pipe, or compromised by malicious hackers. They also save the day if your external drive goes south, if an important file develops corruption, and even when you make a mistake and delete essential data from a file without realizing until Undo can no longer help.
It’s important to think through your backup strategy. Don’t assume that a single backup to a hard drive on your desk is good enough—it’s not because a fire or flood will likely damage any backup hardware attached to your Mac. Another common error is not realizing that if you rely on your Mac to get your work done, you may not want to wait as long as it will take to restore from certain types of backups. Our triple-play strategy will help you avoid these problems.
Backup #1: Time Machine
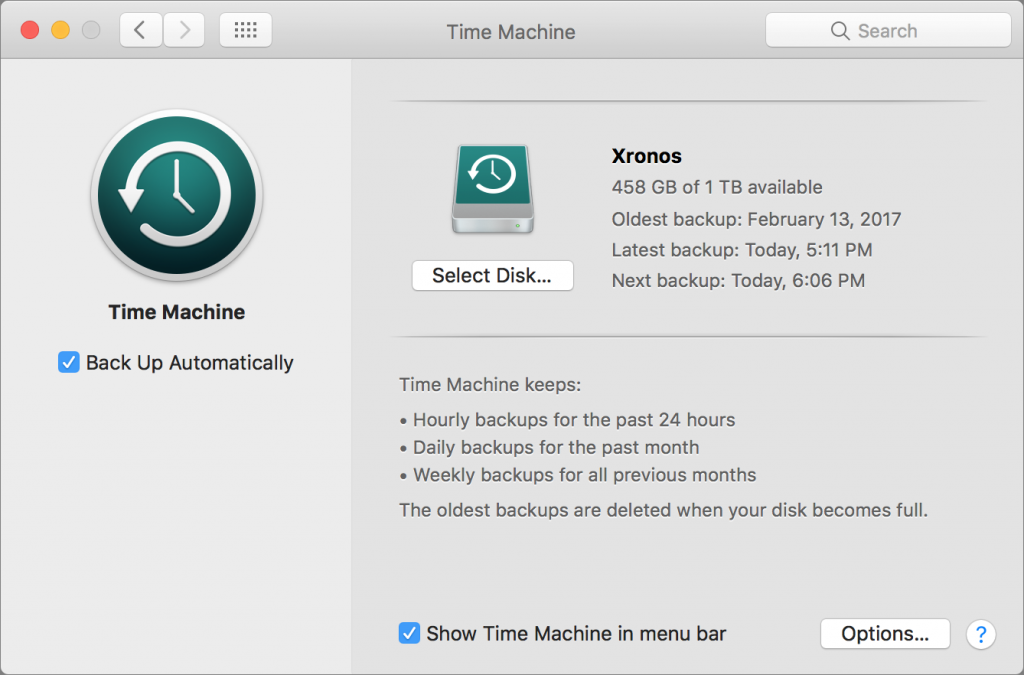
Apple has been making backups easier since 2007 by providing the Time Machine backup software with the Mac. Set it up with an external drive and it will cheerfully create versioned backups, which contain multiple copies of each file as it changes over time. With versioned backups, you can restore a lost or damaged file to its most recent state, or to any previous state. That’s essential if corruption crept in unnoticed and you’ve been backing up a corrupt file for some time. Time Machine also enables you to restore an entire drive as of the latest backup, which you might do if you have to reformat or replace your drive.
Time Machine backups, useful as they are, can’t help you in two situations:
- If your Mac’s main drive dies, but you need to keep working in order to meet a deadline, you won’t want to wait for hours while you reformat and restore—or longer if you must first install a new drive. To keep working with minimal interruption, you need a bootable duplicate, which is an exact clone of your drive.
- Should you be so unlucky as to experience a burglary, fire, or flood that affects your Mac, it’s likely that your Time Machine drive—and your bootable duplicate—will suffer the same fate and thus be useless as a backup. To protect against that unhappy possibility, you need an offsite backup.
Backup #2: Bootable Duplicate
If you don’t have time to deal with a dead startup drive until you meet a deadline, you can work from your bootable duplicate instead. To make one, you need an external drive that’s as large as your Mac’s internal drive, or at least a good bit bigger than the amount of data on your drive. If you have a really large drive, you could partition it in Disk Utility and use one partition for Time Machine and the other for a bootable duplicate.
You also need backup software that can create a bootable duplicate. The leading contenders are Carbon Copy Cloner ($39.99) and SuperDuper! ($27.95). Both are easy to set up and can update your bootable duplicate reliably on a regular schedule—nightly is best.
Backup #3: Offsite Backup
If disaster strikes both your Mac and its attached backup drive, you’ll be ecstatic that you stored a backup elsewhere. When it comes to offsite backups, you have two basic choices:
- Set up two or three backup drives with Time Machine, or with Time Machine and a bootable duplicate on separate partitions, and store one of them in another location, such as a trusted friend’s house or your office across town. A safe deposit box also works well. (If you’re storing it where someone else could access it, make sure to encrypt the Time Machine backup and use FileVault to protect the bootable duplicate’s contents.) Then, on a regular basis, swap the drives such that you’re backing up to one, and keeping another off-site.
- Use a cloud backup service, which you can back up to and restore from over the Internet. The two leading services with good Mac apps are Backblaze and CrashPlan. Plans for both start at about $5 per month or $50 per year for one computer. These apps back up constantly in the background, so you’re always protected. Their main downside is that they’re slow in both directions, but in the event of a four-alarm fire that melts your Mac, retrieving your data slowly is better than not getting it back at all.
So there you have it. Use Time Machine for continual protection of your data, a bootable duplicate so you can return to work quickly if your drive dies, and an offsite backup in case of catastrophe. If you have questions or want hands-on help setting up a sensible backup system, just contact us.
Twitter: Don’t lose data or work time because your backup strategy didn’t protect you from disaster! Here’s the deal:
Facebook: No one expects the Spanish Inquisition! Or file corruption, drive death, fire, flood, or theft. Here’s how to protect yourself.
Stay Focused in Apple Mail with These Handy Filters
It can be difficult to stay focused on a specific task in the Mail app when you keep getting distracted by incoming messages. Fortunately, you can reduce these distractions using the Filter feature that Apple added in macOS 10.12 Sierra and iOS 10—and you can look forward to working with it in the upcoming 10.13 High Sierra and iOS 11.
These filters are different from filters in other email programs that move messages between mailboxes—those are equivalent to Mail’s rules. Instead, these filters are more like searches, in that all they do is show messages in the current mailbox that match the filter, hiding everything else. They don’t move or modify messages in any way.
To start using these filters, on the Mac, click the Filter button at the top of the message list in any mailbox, or in iOS, tap the Filter button in the bottom-left corner.
By default, mailboxes show only unread messages. Click or tap Unread to bring up all the preset filter choices, which fall into four categories:
- Email account: This “Include Mail From” section appears only if Mail checks more than one account, like iCloud and Gmail. These choices let you tell Mail to show messages from only certain accounts, making it easy to focus on work mail during the day, for instance, or only personal mail when you’re home.
- Status: In this “Include” section, you’ll probably want to keep Unread selected most of the time to show just new messages, but you can also select Flagged to find messages you’ve marked previously.
- Addressed: Sometimes it may be helpful to see only messages that have your address in the To line, versus those where the sender CC’d you. These options will also hide most mailing list messages, automated email, and marketing offers.
- Attachments and VIPs: These options are great in scenarios where, say, you want to see just messages that contain attachments to find that presentation a colleague sent last week or when you want to view mail that comes from the people whom you’ve anointed as VIPs.
Since you can pick more than one of these options, you can tell Mail to display just unread messages sent to your work email account that have attachments and come from the people who are on your VIP list. Imagine the possibilities!
Once you’ve gone through the filtered list of messages, click or tap the Filter button again (Mail fills it with gray or blue) to remove the filters and see all the messages in the mailbox again. Happily, Mail remembers your filter settings, so enabling filters again returns you to the same focused view you had before.
Twitter: The Filter feature in Mail in both macOS and iOS makes it easy to focus on a subset of messages.
Facebook: If you’re overwhelmed by email, check out the Filter feature in the Mail app in both macOS and iOS to look at just a subset of messages.
Graphic Alphabet Soup: What Are Different Formats Good For?
When it comes to graphics on the Internet, it’s easy to feel as though you’re swimming for your life in a giant bowl of alphabet soup, surrounded by shouting acronyms: GIF! JPEG! PNG! TIFF! What do those names mean? Why does your camera spit out JPEGs? What’s the best format for a Web graphic? Grab onto a capital O and let’s get some answers.
First off, don’t worry about the acronyms, because expanding them doesn’t explain much. For example, JPEG stands for Joint Photographic Experts Group, which is the standards body that invented the JPEG format. Helpful? Not really. So think of them just as names, like Gabriela or Jayden. That said, it can be helpful to know how they’re pronounced:
- GIF: Either “jif,” as in jiffy, or “gif” as in “gift” — it’s an interesting story.
- JPEG: “jay-peg”
- PNG: “ping”
- TIFF: “tiff”
Here’s the lowdown on each.
GIF
The oldest of these formats, GIF was long the standard for computer-generated images. It worked well for graphics and logos with large areas of solid color, but less so for photos. Due in part to a patent licensing kerfuffle, GIF has been superseded by PNG in all ways but one.
GIF’s remaining use lies in flipbook-style animations, where each frame is a separate GIF image. Animated GIFs that run in short loops have become wildly popular on the Internet because they’re small and easy to embed in a Facebook or Twitter post, email message, or Web page. Numerous utilities exist for turning a short movie clip into an animated GIF; check out GIF Brewery on the Mac or Giphy Cam for an iPad or iPhone.
JPEG
The most common graphics format on the Internet, JPEG owes its popularity to being the default format for photos created by all digital cameras, including (until iOS 11) those in iPhones and iPads. JPEG works well for photos because it can compress file sizes significantly while barely affecting the image quality.
For instance, a 20 MB photo saved in JPEG format might end up as only 4 MB, with reductions in image quality that most people would never notice. Most graphics software lets you adjust a slider to specify different quality levels, and while the results vary by the photo, saving at a 75% quality level is usually a good compromise between quality and file size.
The downside of JPEG is that it achieves these minuscule file sizes by throwing away data in the file, which limits how it can be edited in the future. That’s why professional photographers generally shoot in what are called “raw” formats (which contain all the image data the camera sensor recorded when the shutter was opened). Raw files are huge but can be edited in ways that aren’t possible with a JPEG file. Once edits have been made, photographers save a copy as a JPEG for sharing or posting online.
PNG
Conceived as an improved, patent-free alternative to GIF, PNG is now the go-to format for online graphics that have large areas of solid color, such as buttons, logos, and screenshots That’s because PNG can compress such images well without introducing fuzziness, as can happen with JPEG. Similarly, you can edit PNG images repeatedly without hurting image quality.
In another contrast with JPEG, PNG supports transparency, which means you can define one color in an image as “transparent” rather than an actual color. When the image is displayed on a Web page, the transparent pixels are rendered in whatever the background color is. That’s tremendously handy for creating images that seem to float over the background.
Don’t use PNG for photos, since a photographic image saved in PNG format will be much larger than the corresponding JPEG.
TIFF
Like PNG, TIFF files can be compressed without losing any data. Because of this, TIFF is used extensively for archiving original photos instead of JPEG; TIFF files may be much larger, but that’s acceptable when it comes to preserving originals from which you could later make edited copies.
TIFF also boasts some additional color-related features that PNG lacks, making TIFF useful in the print world—if you were to write a book that was going to be printed professionally, the publisher might ask for any photos or other illustrations in TIFF format. Useful as TIFF can be, for most people, most of the time, JPEG and PNG are all you need.
Back and Forth
Nearly any graphics program can open images in these formats and convert to the other formats, but look no further than the Preview app from Apple on your Mac for basic image conversion features. For more info about using Preview, check out Take Control of Preview, by Adam Engst and Josh Centers.
Now that you know the basics of the Mac’s most important graphics formats, you’re ready to put your best foot forward whenever you need to pick a file format for your images.
One last thing! You might start hearing about a new format once iOS 11 and macOS 10.13 High Sierra arrive later this year: HEIF, or High Efficiency Image File Format (we don’t know what happened to the extra F either). HEIF provides tight compression, transparency support, animations, and much more. But you probably won’t interact with HEIF files, since Apple plans to use HEIF only behind the scenes. Instead, when you save or share an image, the operating system will automatically convert it to one of the more standard formats.
Twitter: If you’re boggled by graphics formats—GIF, JPEG, PNG, TIFF—head over to our site to come up to speed on each.
Facebook: If you’ve ever wondered which graphics format—GIF, JPEG, PNG, TIFF—is best for a particular use, here’s the scoop.
Teleport Around Your Mac with the Sidebar
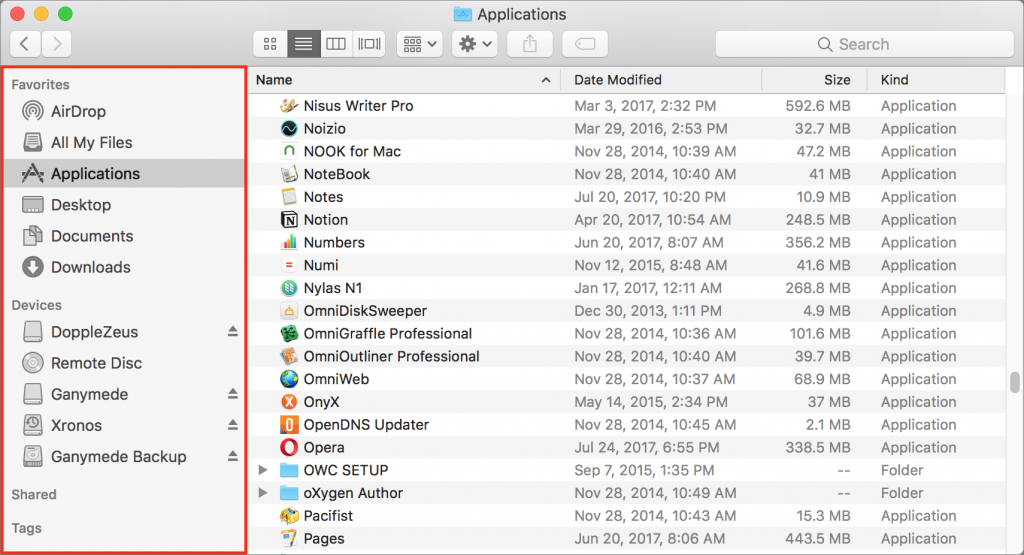
If your Mac resembles an absent-minded professor’s office with files and folders strewn hither and thither, getting to the right spot to open or save a file may have become slow and clumsy. Sure, in an ideal world, you’d organize everything perfectly, but you’d also be flossing twice a day, calling your mother every Sunday, and eating more leafy greens. So let’s talk about a shortcut that lets you put off that big reorg for another day: the sidebar that graces every Finder window and Open/Save dialog.
First, make sure it’s showing. In the Finder, with a Finder window active, if the View menu has a Show Sidebar command, choose it. (If it says Hide Sidebar, the sidebar is already showing.) Or, when you’re in an Open dialog, click the sidebar button in the dialog’s toolbar to show and hide the sidebar.
Now, to make the best use of the sidebar, try these tips:
- By default, the sidebar shows a lot of items you likely don’t use. Turn off anything extra to make the sidebar shorter and more useful. Choose Finder > Preferences > Sidebar to see four categories of sidebar items. Favorites generally holds folders, Shared items are networked computers and servers, Devices are hard drives and other storage devices, and Tags displays recently used Finder tags. Be ruthless here and uncheck anything that you seldom use or don’t understand.
- To make the sidebar more manageable temporarily, hover the pointer over a category label in the sidebar and click Hide when it appears. That category’s contents disappear, making what’s still in the sidebar easier to focus on; to get them back, hover over the label again and click Show.
- Add your own frequently used folders to the Favorites category so you have one-click access to them in the Finder and when opening or saving files. Drag a folder from the Finder to the Favorites list to add it. The folder remains on your disk in the original location, but if you click it in the sidebar, its contents appear instantly in the Finder window.
- Don’t be shy about adding and removing folders; there’s no harm in adding a folder for a few days while you’re working on a project, and then removing it when you’re done. To remove a folder, Control-click it and choose Remove from Sidebar. The folder disappears from the sidebar but stays on your disk.
- Organize your favorites so they’re in an order that makes sense to you, whether that’s alphabetical or the most important at the top. To do this, simply drag them to rearrange.
- Once you’ve set up your sidebar, make sure you use it! In the Finder, to open files, click a folder in the sidebar to display its contents. You can even drag files from one folder into another folder in the sidebar to move them—or Option-drag to copy them.
- When you’re in an app and want to open a file, choose File > Open, and in the Open dialog, click sidebar items to jump directly to those folders. The same goes when saving a new file; choose File > Save and use your sidebar to navigate to the desired location.
Put these tips into play on your Mac, and you’ll be teleporting between far-flung folders in no time!
Twitter: We may lack Star Trek-style transporters, but we can show you how to teleport around your Mac using the sidebar!
Facebook: Having trouble getting to your frequently used folders on the Mac easily? The Finder’s sidebar is your friend.
Sequels Rule! Reuse File Names in the Mac’s Save Dialog
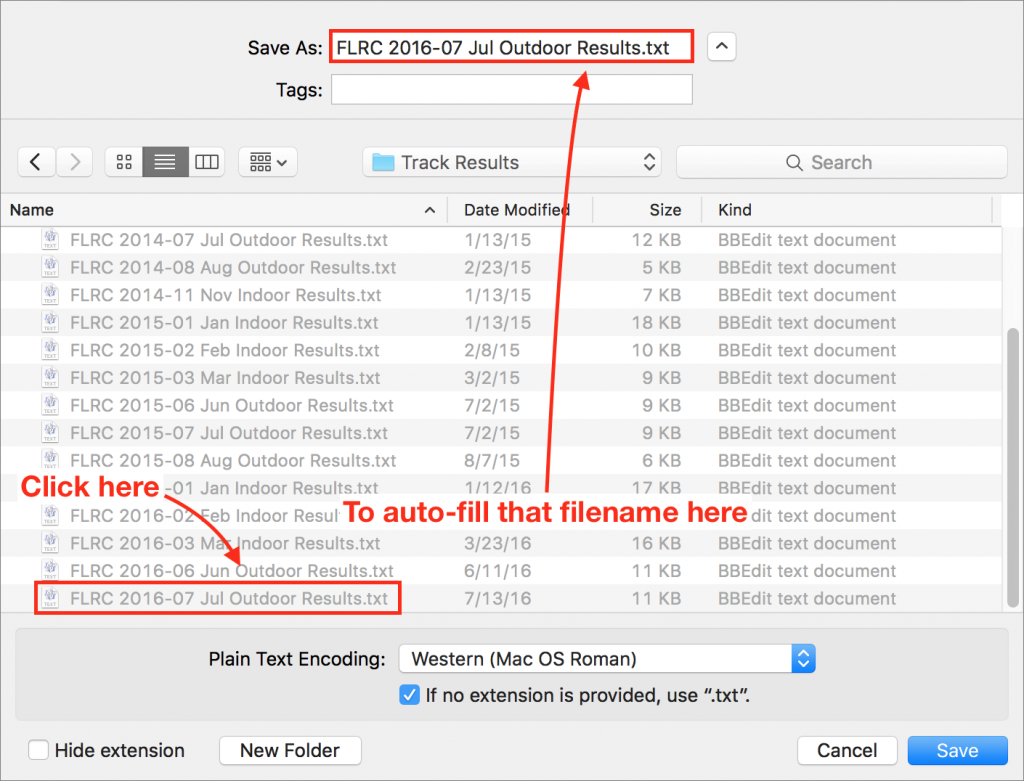
If you frequently create files whose names vary from those of other files in the same folder by only a date, sequence number, or the like, you can ensure regularized file naming and save effort with this trick. When saving your file, click a grayed-out filename in the Save dialog’s list. That causes macOS to auto-fill the clicked name in the Save As field, where you can tweak it rather than typing a new name from scratch.
Hey Siri, Could You Please Talk Less?
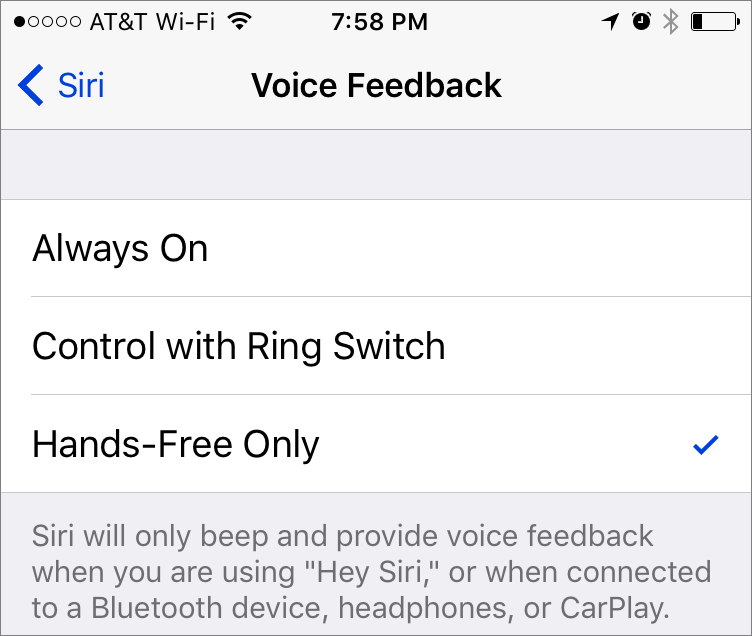
By default, Siri likes to chat, confirming what you say and speaking the results of your commands when appropriate. If you don’t like that, go to Settings > Siri > Voice Feedback and select either Control with Ring Switch (the iPhone’s physical switch) or Control with Mute Setting (iPad) to make Siri be quiet when the device is muted. Alternatively, choose Hands-Free Only to silence Siri except when connected to Bluetooth, headphones or CarPlay. Or set Siri to whisper—hold the Home button to invoke Siri and then reduce the volume, which applies only to Siri’s voice.
Have You Tried Falling Asleep to Music or Lectures?
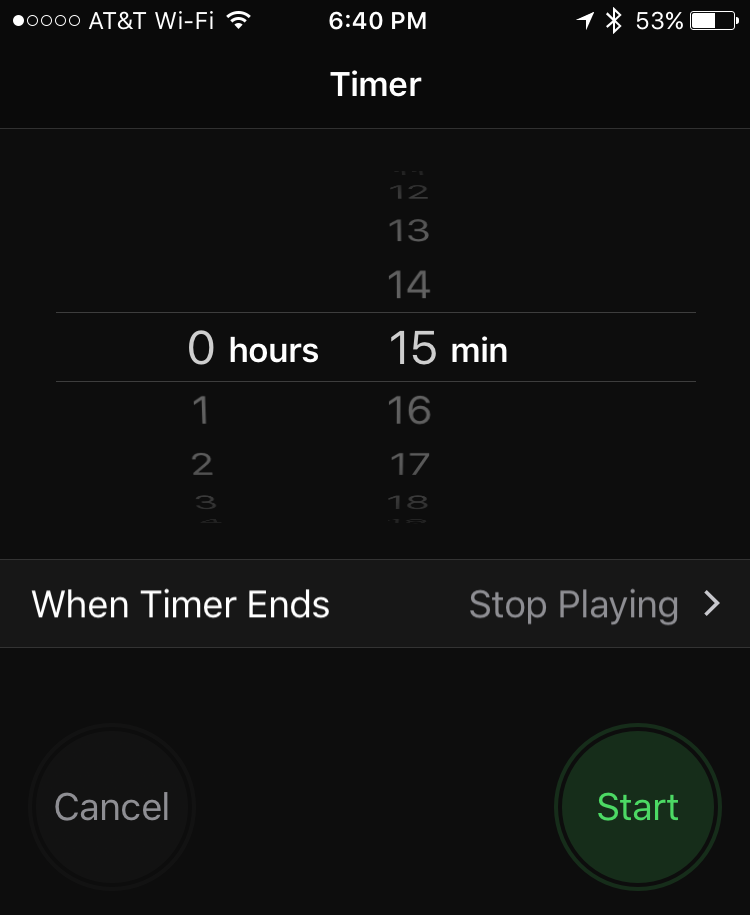
iBooks in iOS has a built-in sleep timer that can automatically pause playback after a specified amount of time, which is great for listening to an audiobook as you go to sleep (tap the Moon button below the volume slider). What if you prefer listening to content that’s not in iBooks, like music or a college lecture? To set a sleep timer that works for Music, iTunes U, or any other app that plays audio, open the Clock app and tap the Timer button. Next, tap When Timer Ends (iPhone) or the selected sound (iPad), scroll to the end of the list of sounds, and select Stop Playing. When you’re ready to listen as you drift off to sleep, start the timer just before or right after you press Play in your audio app.
How to Quickly Select Items in a List from the Keyboard
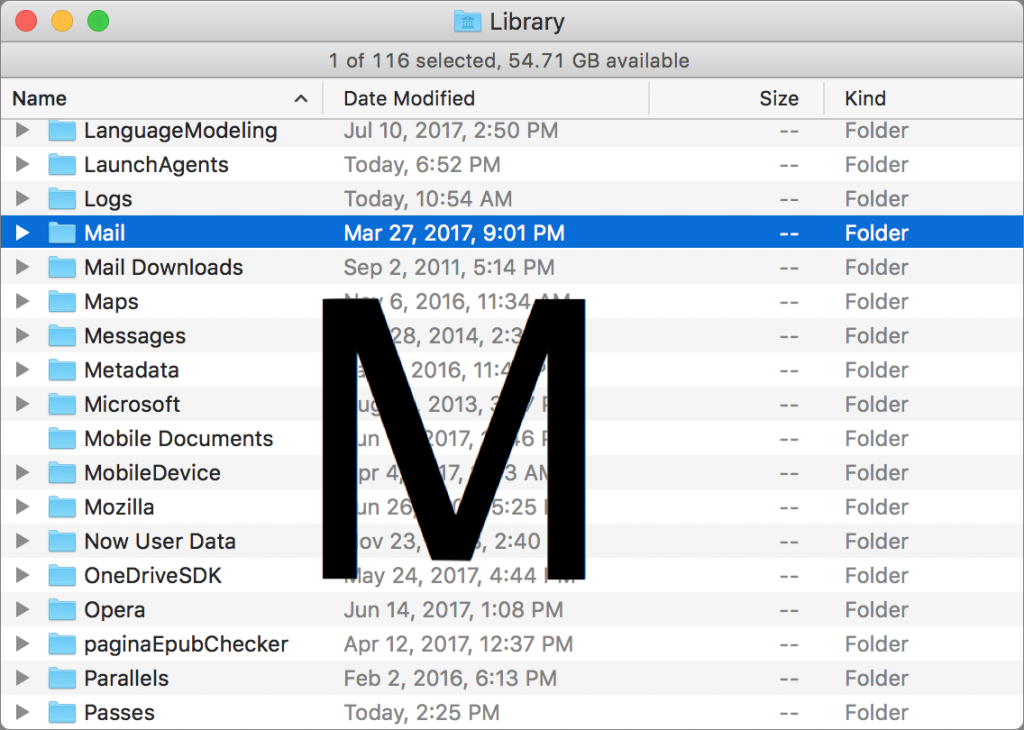
Even if you already know this tip, you may not have realized all the places where it works. When you find yourself in a list on the Mac, as in a Finder window, an Open dialog, or a set of auto-completion options, you can usually press keys on the keyboard to navigate within the list. Press M, and you’ll select the first item whose initial letter is M. If multiple items start with M, use the Up and Down arrow keys to move one item at a time. And rather than clicking an Open or OK button, try pressing Return to activate the selected item. So if you assumed you had to use the pointer to scroll through lists and click list items, try the keyboard—it’s faster to type W than to scroll all the way down to Wyoming in a list of states.