Easier Ways to Move the Cursor When Editing Text on an iPad or iPhone
A Quick Trick to Turn Your iPhone into a Magnifying Glass
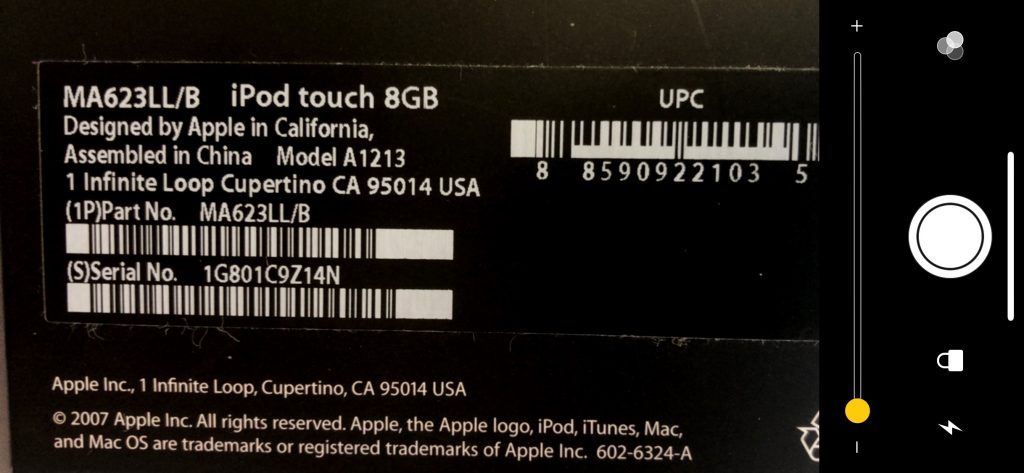
It’s maddening to want to read a serial number or other bit of fine print that you can barely see. But fret no longer—your iPhone or iPad makes a fabulous magnifying glass! Assuming Magnifier is enabled in Settings > General > Accessibility > Magnifier, you can bring it up by pressing the Home button (for Touch ID devices) or side button (for Face ID devices) three times quickly. If that’s too hard to remember, you can also add a Magnifier button to Control Center in Settings > Control Center > Customize Controls. The special camera viewfinder is zoomed automatically, but you can change the zoom level with the slider, tap the flash icon to turn on the LED light (if available on your device), enable a filter to change the color or contrast, or lock the focus by tapping the lock icon. You can also freeze the image by tapping the white shutter button, which is great for grabbing a picture of a tiny serial number on the back of some device (tap that button again to resume using Magnifier). To leave Magnifier, press the Home button or swipe up from the bottom of the screen.
And YES – Jason Boettcher. I actually use this, because suddenly I have the eyes of a much older man. XOXO- T
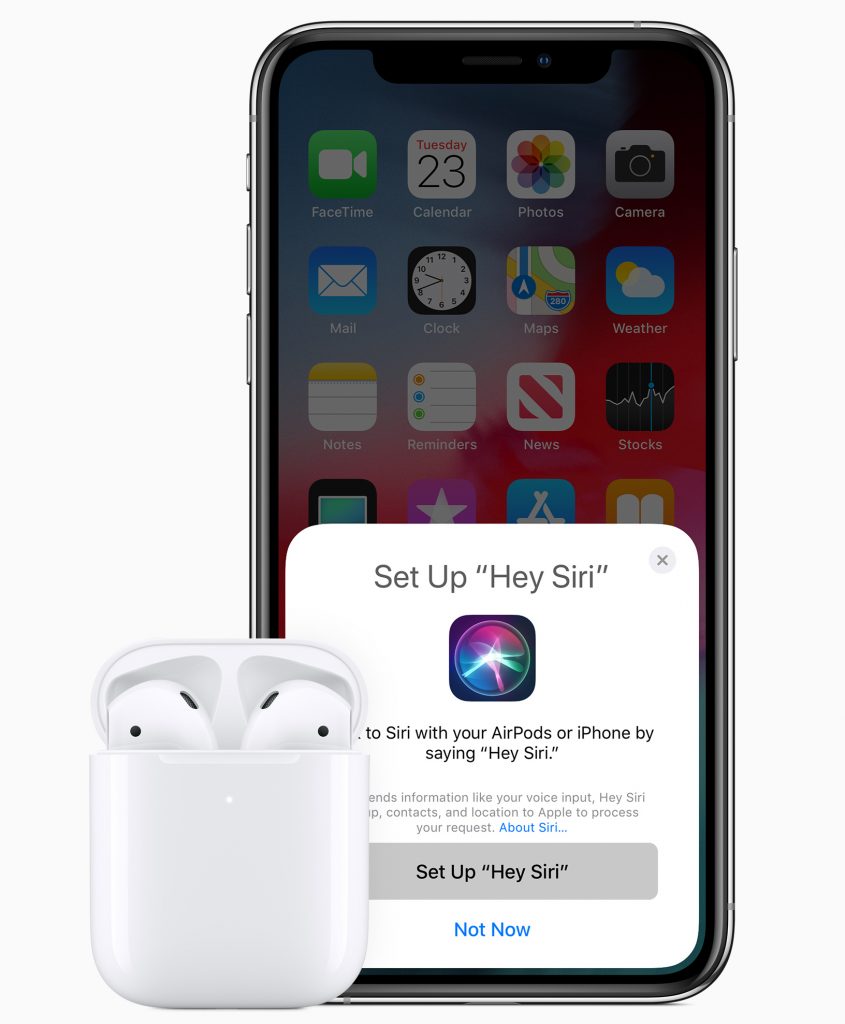
Apple’s New AirPods Add “Hey Siri,” More Talk Time, and Optional Wireless Charging


The Secret Trick for Enabling Caps Lock When Typing in iOS
The Caps Lock key on Mac keyboards often feels extraneous, since it’s easy enough to hold the Shift key while typing multiple capital letters for acronyms like HIPPA or when you want to shout GET OFF MY LAWN! But if you need to do that on an iPhone or iPad, it’s annoying to keep tapping the Shift key to switch to the uppercase keyboard for each letter. Luckily, Apple has baked a time-saving trick into its onscreen keyboard. Tap the Shift key twice in a row to lock it on, type the letters you need, and tap it again to unlock it. Notice that when Shift is locked on, a horizontal line appears beneath the arrow on the Shift key.

Three Ways to Tell If You Should Get a New iPhone Battery before 2019
Are you happy with your iPhone’s battery life? If your iPhone regularly ends up in Low Power Mode or doesn’t always make it to the end of the day without extra juice, read on to learn how to determine when it’s time for a new battery.
It may be important to get to this soon because people with an iPhone 6, SE, 6s, 7, 8, or X can likely get Apple to replace the battery for just $29 through December 31st, 2018—the price will go up in 2019. (The cost is $79 for even older iPhones; non-Apple repair shops may be less expensive, but it’s generally better to stick with Apple’s parts and service providers.) That $29 price is thanks to a discount program Apple instituted in January 2018 as an apology for silently reducing the performance of the iPhone 6 and later in an effort to prevent them from shutting down due to weak batteries. See Apple’s A Message to Our Customers about iPhone Batteries and Performance for details.
Here are the top three signs that you need a new battery right away.
1. Your iPhone Is Bulging
This one is obvious and possibly dangerous. If the lithium-ion battery in your iPhone is defective or damaged, it can swell due to outgassing or other chemical reactions. In the worst case, a swollen battery can catch fire or explode—it’s why airlines are concerned about batteries in luggage.
If you notice your iPhone is swelling, you need to deal with it immediately. Power it off and place it in a fireproof container. Then take it to a repair professional or an Apple store right away, or call us for advice on how best to proceed.
2. Your Older iPhone Has Lousy Battery Life or Shuts Down Unexpectedly
Generally speaking, iPhone batteries last a few years without losing too much capacity. However, if your iPhone’s battery drains well before the end of the day, or if it shuts off unexpectedly, that’s a sign that you may need to replace the battery.
Before you do that, go to Settings > Battery and look at battery usage by app, which shows which apps have consumed the most power for the last 24 hours or the last 10 days. Tap Show Activity to see how many minutes the app was in use.
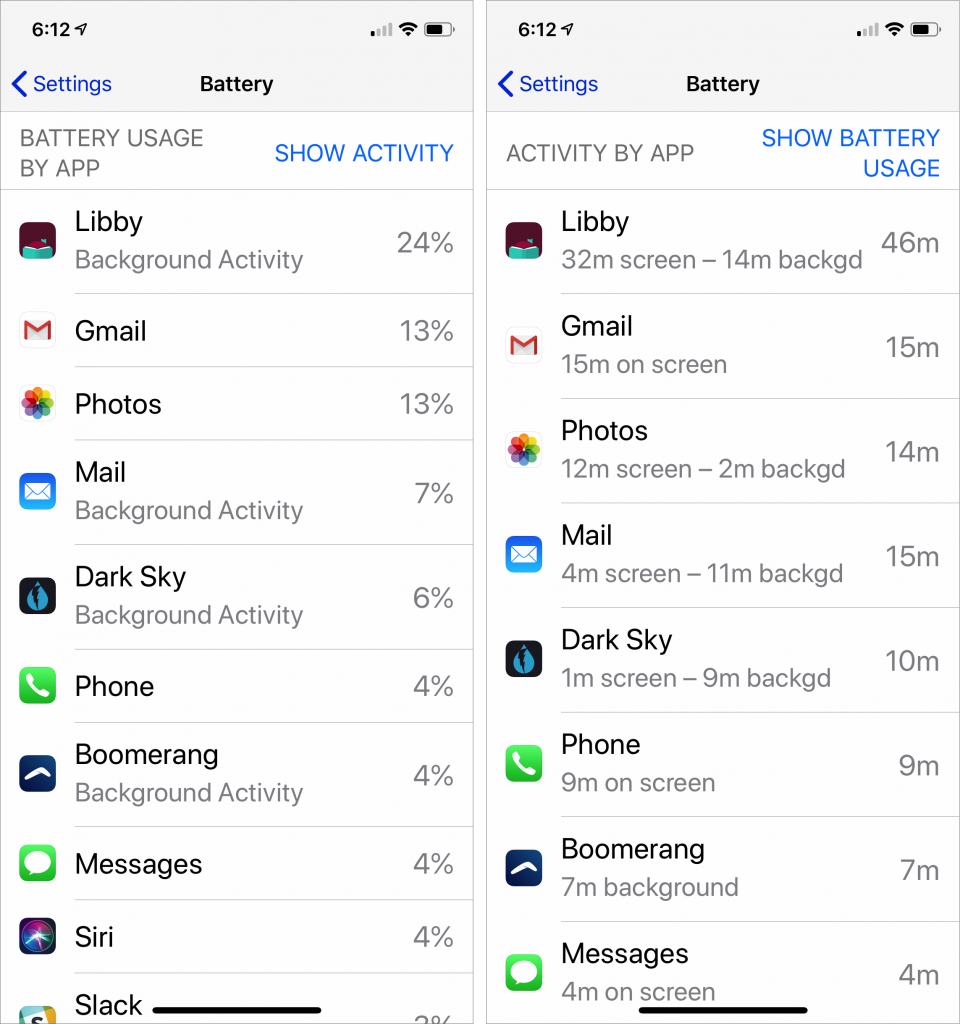
If anything near the top of that list seems odd—it’s not an app you use much or its background activity is excessive—consider force-quitting the app. (Open the app switcher by double-pressing the Home button on a Touch ID iPhone or swiping up and slightly right on a Face ID iPhone, then swipe up on the app’s thumbnail.) You might also disable that app’s switch in Settings > General > Background App Refresh.
But if your iPhone is more than a few years old, it’s probably time for a new battery. Batteries are consumable items, and Apple designs the iPhone to retain up to 80% of its original capacity after 500 complete charge cycles (from 0% to 100%, even if that comes over the course of several charging sessions). Don’t suffer with a weak battery—just get it replaced.
3. An iPhone 6 or Later Feels Sluggish
Starting with iOS 10.2.1, Apple changed things so the iPhone 6 and later would reduce performance to avoid peak power demands that could overwhelm an older battery and cause the iPhone to shut down unexpectedly. Not shutting down is good, but reducing performance is bad.
So if you have an iPhone 6 or later that feels poky, it may be iOS throttling performance to work around a weak battery. With iOS 11.3 or later on these iPhone models, you can go to Settings > Battery > Battery Health to learn more about your battery. iOS displays your maximum battery capacity and, under Peak Performance Capability, tells you if it has enabled performance management to avoid shutdowns. That’s a hint you need a new battery, and we’d be concerned about any maximum capacity under 90%.

iOS lets you disable performance management to avoid the throttling, but it’s nuts to do that and risk unexpected shutdowns. Just replace the battery and your performance will return to normal.
Apple will replace an iPhone battery for free under warranty only if its maximum capacity is under 80% and it has had fewer than 500 charge cycles. However, as previously noted, the company will replace an out-of-warranty battery in the iPhone 6 and later for $29 (plus $6.95 if shipping is required) through the end of 2018, so it’s worth taking advantage of the deal this month. In 2019, the price will go up to $49 for most iPhones and $69 for the iPhone X.
So hey, don’t suffer with an iPhone that’s working poorly due to the battery!
Use Continuity Camera to Scan Documents and Take Photos Right into Mac Documents
Have you found yourself composing an email message on your Mac while staring glumly at the receipt or document you need to scan and attach to the message? Adding that scan to the message isn’t impossible, but until macOS 10.14 Mojave, it hasn’t necessarily been easy.
It’s super simple now, thanks to a new Mojave feature called Continuity Camera. It lets you take pictures or scan documents with an iPhone or iPad running iOS 12 and have those images show up immediately on the Mac, either in a document or on the Desktop.
Continuity Camera Basics
Apart from Mojave and iOS 12, Continuity Camera requires that the devices be on the same Wi-Fi network, have Bluetooth turned on, and be logged in to the same Apple ID, which must use two-factor authentication. Continuity Camera also requires explicit support in apps, which means for the moment that it works only in Apple’s apps, including the Finder, Mail, Messages, Notes, TextEdit, Pages, Keynote, and Numbers. We aren’t aware of any third-party apps that support it yet.
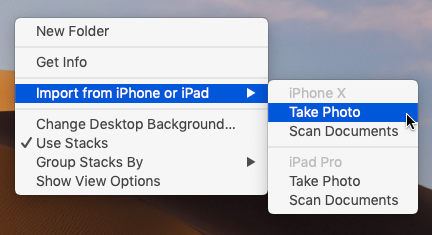
How you access Continuity Camera can vary by app, but the most common approach is to Control- or right-click where you want the scan or photo to go. Look either for commands for Take Photo and Scan Documents, or for an Import from iPhone or iPad submenu, under which those commands will be replicated for each device.
The Take Photo and Scan Documents commands may also appear in the File menu or in an Insert menu. Plus, Mail composition windows have a drop-down menu on the right side of the toolbar that includes those commands.
Should you import directly into an app, or onto the Desktop? It’s up to you, of course, but adding a file to the Desktop that you can then drag to its eventual destination gives you more options for reuse or modification, along with backup. That could be important since the photos and scans aren’t stored on the iPhone or iPad.
Using Continuity Camera
Follow these steps to use Continuity Camera to take a photo or scan a document to your Mac. Because it’s the most likely scenario, we’ll describe importing to the Desktop from an iPhone, but the steps are the same for importing into any supported app or from an iPad.
First, Control-click the Desktop and choose either Import from iPhone > Take Photo or Import from iPhone > Scan Documents. A dialog appears on the Mac screen, telling you to use the iPhone to take the photo or scan the document. The iPhone displays a variant of the Camera app automatically.

If you’re taking a photo, you can switch between the rear- and front-facing cameras, pinch out to zoom, or enable the flash with the flash button. All you need to do is tap the shutter button. If the photo is blurry or otherwise unusable, tape Retake to try again, but if you like it, tap Use Photo. The picture shows up immediately on your Mac as a JPEG file.

If you’re instead scanning a document, you also get a Filters button that lets you set the scan type: color (the default), grayscale, black-and-white, or photo. By default, the scanning interface takes a picture automatically when it detects a document. If it moves too fast for you, tap Auto (at the upper right) to switch to Manual. Then tap the shutter button to capture the image, after which you may drag the circles to identify the document corners better. Then tap Retake or Keep Scan. If it’s a multi-page document, flip the page and continue scanning to add more pages. When you’re done, tap Save to send the document to your Mac as a PDF.

That’s it! The first time or two might seem a little awkward, but once you get the hang of Continuity Camera, it’s a wonderfully quick way to get a scan or photo onto your Mac.
Finally! iOS 12 Lets You Use Google Maps or Waze in CarPlay
Before iOS 12, Apple Maps was the only mapping app you could run on the dashboard in a CarPlay-equipped automobile. But Maps doesn’t always work well, and some people prefer directions from Google Maps or the Google-owned Waze. Once you upgrade your iPhone to iOS 12 and update to the latest version of Google Maps or Waze for iOS, you’ll be able to use those apps on your CarPlay screen. Happy navigating!

A Hidden Trick that Lets You Navigate Your iPhone with One Hand
Unless you can palm a basketball, you may not be able to use an iPhone single-handed. But sometimes one hand is all you can spare. If you find yourself in such a situation, give Reachability a try. On a Touch ID–based iPhone, tap (don’t press) the Home button twice to slide the iPhone’s interface halfway down the physical screen, bringing everything into reach of your thumb. On the Face ID–equipped iPhone X, put your thumb in the bottom of the screen—about at the top edge of the Dock if you were on the Home screen—and swipe down. You can use apps normally for a tap or two, and then they’ll expand back to the full screen to show the full interface. If Reachability is off (or if you want to turn it off), go to Settings > General > Accessibility.
Seriously Cool Features of macOS 10.14 Mojave You Won’t Want to Miss
With last year’s macOS 10.13 High Sierra, Apple made no sweeping changes, instead focusing on refinements and bug fixes. In keeping with the company’s alternating cycle of releases, this year’s macOS 10.14 Mojave boasts plenty of new features.
Dark Mode and Dynamic Desktop
In a major visual change, Mojave features a new Dark mode that reverses the standard black-on-white look with light gray text on a dark background throughout the interface—change it in System Preferences > General. If your eyes find white window backgrounds too bright, Dark mode will be a boon. Or, if the current bright approach doesn’t bother you, Dark mode may seem muddy and hard to read because of its reduced contrast.
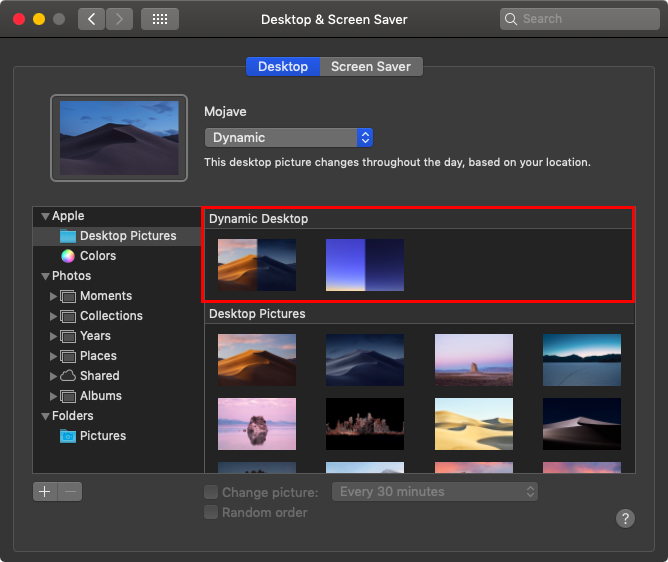
Dark mode may be useful, but Dynamic Desktop is just eye candy. Select either Mojave or Solar Gradients in System Preferences > Desktop & Screen Saver > Desktop, and your wallpaper will change throughout the day.
Finder Stacks and Groups
Turning to more practical changes, Mojave’s Finder boasts a few new features to help you better navigate a cluttered Desktop and overflowing folders. Control-click the Desktop and choose Use Stacks, and the Finder will combine all the related icons on your Desktop into stacks. It collects them by kind by default, but you can instead have it group them by various dates or even by tags. Click a stack to see what’s inside.

Groups are like Stacks, but within a Finder window. With a Finder window open, choose View > Use Groups, and note that you can use the View > Group By submenu to change the grouping from kind to application, date, size, and tag.

Quick Actions in the Finder and Quick Look
The Finder’s new tricks go even further, with Quick Actions. Controlled in System Preferences > Extensions > Finder, these quick actions let you rotate or mark up a document within the Finder’s preview pane or a Quick Look window (select a file and press the Space bar). Other quick actions let you create PDFs and trim video.
Most useful of these is the Markup quick action, which gives you most of Preview’s editing tools—cropping, annotating, and more—right in a Finder or Quick Look window.

Still and Video Screen Captures, with Editing
Markup also features prominently in Mojave’s new screen capture interface. You’ve long been able to press Command-Shift-3 for a screenshot of the entire screen and Command-Shift-4 for a portion of the screen. Now, press Command-Shift-5 for an interface to those capabilities, plus video screen recording, which was also possible before with QuickTime Player.

These capabilities may not be new, but they’re a lot easier to use in Mojave, and there are a few new options, such as being able to keep the same size selection across multiple screen captures and include the pointer in screenshots.
Continuity Camera with iPhone
 Have you ever wanted to insert a photo or scanned page into an email message or document? Mojave makes this easier with Continuity Camera, a feature that lets you use your iPhone within a Mac app. In Mail, for instance, start a new message, and then choose File > Insert from iPhone > Take Photo/Scan Documents. Either way, your iPhone immediately switches to the appropriate photo or scanning mode, and the resulting photo or scan lands in your message.
iOS Apps: News, Stocks, Voice Memos, Home
Apple has been emphatic that it is not planning to retire macOS in favor of iOS. However, the company does want to make it easier for developers to write apps that run in both operating systems. As the first phase of that strategy, Apple has ported four iOS apps to the Mac: News, Stocks, Voice Memos, and Home.

They look a little different from their iOS cousins, as they should, but they work similarly, and you can sync their settings and data between your devices via iCloud (look in System Preferences > iCloud on the Mac and in Settings > Your Name > iCloud in iOS).
There are a variety of other small changes throughout Mojave and in Apple’s standard apps, and we’ll share more of those in future posts, so stay tuned!
Social Media: There’s a lot going on in macOS 10.14 Mojave, so read on to learn about Dark mode, Dynamic Desktop, Stacks, Groups, Quick Actions, and even four apps that Apple brought over from iOS.