
For Faster, Easier Photo Sharing, Try an iCloud Link
Is Your Photos Library Too Big? Here’s How to Move It to an External Hard Drive
SSDs are essential for ensuring optimal performance on a Mac, but because they’re expensive, many people don’t have as much built-in storage space as they would like. If your Photos library has grown to the point where your SSD is nearly full, it might be time to think about offloading it to an external hard drive. (Don’t put it on a drive that you’re using as a Time Machine destination because there could be permissions conflicts, and note that Apple doesn’t recommend storing a Photos library on a drive shared over a network.)
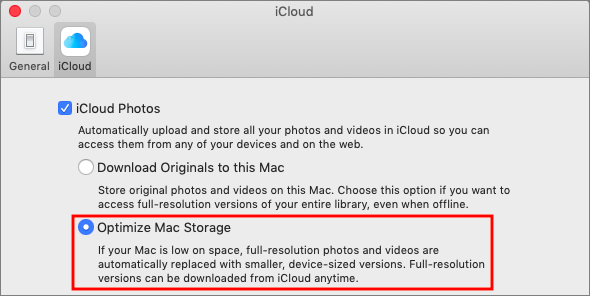
Before we explain how to offload your photos, we want to mention another way of reducing the Photos footprint on your drive. If you’re using iCloud Photos (previously called iCloud Photo Library) to sync photos and videos between your devices, the originals are all stored in iCloud. In Photos > Preferences > iCloud, you can enable Optimize Mac Storage, which swaps the full-resolution images for smaller versions, saving a boatload of space. However, you may find Photos somewhat slower to use, as it has to download full-resolution versions of images you work with, and you won’t have a local backup of the original images. So it’s an option, but it has tradeoffs.
For most people with burgeoning Photos libraries, a better approach is to offload the entire library to an external hard drive. This approach comes with tradeoffs too; accessing images from a hard drive is slower than getting them from an internal SSD, and you have to figure out how you’re going to back up that drive as well. Plus, the drive has to be available, connected, and turned on (so you have to listen to it) for you to use Photos at all, which might be especially annoying if you regularly work remotely on a notebook Mac.
To move your Photos library to an external drive, follow these steps:
- If it’s running, quit Photos.
- In the Finder, drag Photos Library, which is stored in your Pictures folder by default, to the external drive. A few answers to common questions:
- Where on the external drive should I put it? It doesn’t matter, but we recommend putting it at the top level so you are less likely to lose track of it in the future.
- I got an error—what should I do? If you see an error telling you that you don’t have permission to copy to that drive, select the drive’s icon in the Finder and choose File > Get Info to open the Info window. If necessary click the triangle next to Sharing & Permissions, and make sure “Ignore ownership on this volume” is selected. If it’s not, click the lock icon, enter an administrator name and password, and select the checkbox.

- How long will it take to copy? Quite some time, depending on how many photos you have. It’s best to do overnight or when you don’t need to use Photos.
- When it’s done copying, double-click the new Photos Library icon on the external hard drive to launch Photos and set it to open that new copy on future launches.
- If you use iCloud Photos, designate this new library as the System Photo Library by choosing Photos > Preferences > General and clicking the “Use as System Photo Library” button.
- Scroll through your photo collection and make sure all your photos are present—double-click a few of them to spot check that the actual images open properly.


Obviously, your original Photos library is still taking up space on your SSD, but it’s best to use the new version for a little while before deleting the old one, just in case. When you’re ready to do that, drag it from the Pictures folder to the trash and choose Finder > Empty Trash to reclaim the space.
Social Media: Running out of space on your internal drive? You can clear a bunch of space by moving your Photos library to an external hard drive—here’s how:
Need to Merge Photos Libraries? Here Are Your Options
Photos makes it easy to create and switch between libraries. That’s good when photos need to be kept completely separate. For instance, a real estate agent might want to keep personal photos separate from house photos taken for work. But too much separation is annoying—you have to keep switching between libraries, and it’s easy to import new photos into the wrong one.
If you struggle with multiple Photos libraries, never fear—you can merge them. Unfortunately, the process is slow, can require a lot of disk space, and may result in the loss of some metadata. You have three options: merging through iCloud Photos, using the PowerPhotos utility, and merging by exporting and importing. Each has pros and cons.
Merge through iCloud Photos
Apple’s iCloud Photos service offers the best solution for merging libraries. The trick is that whenever you designate a library as your System Photo Library, Photos automatically uploads all images that aren’t already present, adding them to the photos already in iCloud Photos. It also retains all the metadata surrounding your photos—titles, keywords, albums, facial recognition, projects, and more.
On the downside, using iCloud Photos almost certainly won’t be free unless you have so few photos that the combined library will fit within the free 5 GB of iCloud space Apple gives everyone. Almost everyone will have to pay for additional storage space ($0.99 per month for 50 GB, $2.99 for 200 GB, or $9.99 for 2 TB) for at least the month in which you’re doing the merge. iCloud Photos is a good service, so it’s likely worth paying for anyway.
More problematic is that the iCloud Photos way of merging will be very slow. If you haven’t already started using it, it could take a week or more to upload many thousands of photos. Plus, it will probably download the entire cloud-based collection of photos to each library whose photos you want to merge, so you may need a lot of local disk space too.
If you haven’t previously used iCloud Photos, go to System Preferences > iCloud and click the Options button next to Photo. In the dialog, select iCloud Photos.

Now, starting with the smallest Photos library and working up in size, follow these steps for each library you want to merge:
- Double-click the Photos library to open it.
- In Photos > Preferences > General, click Use as System Photo Library. (If it’s dimmed out, that library is already set as the System Photo Library.)
- Wait for photos to upload. Scroll to the bottom of the Photos view to see the progress. A Pause link will appear there during uploading—click it if you need to keep Photos from overwhelming your Internet connection. Once the photos have all uploaded, go back to Step 1 with your next Photos library.

When you’re done, the last Photos library becomes the one you’ll keep, and you can delete the others. Needless to say, make sure you have good backups first!
Merge with PowerPhotos
The $30 PowerPhotos from Fat Cat Software provides a variety of extra capabilities when working with Photos. It helps you to create and manage multiple libraries, copy photos between libraries, find duplicates, and—most important for this topic—merge libraries.
Because PowerPhotos is working entirely on your Mac’s drive, it’s fast and it doesn’t require huge amounts of extra disk space. Unfortunately, unlike the iCloud Photos approach, which brings in both originals and any edits to those photos, PowerPhotos can import only your original photos or the versions that you’ve edited, not both. Plus, it can’t merge facial recognition data, smart albums, or print projects.
PowerPhotos provides an actual interface for merging too—choose Library > Merge Libraries to start.

In the window that appears, you have four tasks:
- Choose source libraries. You aren’t limited to merging just two libraries; you can pick multiple sources.
- Choose the destination library. This is the library you want to receive all the photos. If you want, you can create a new one.
- Configure duplicate handling. PowerPhotos can import just one of several copies of duplicate photos, or you can bring in all the duplicates if that’s important.
- Choose options. PowerPhotos can merge album contents, create an album from each source library, and create a backup before merging. Most important, though, is the choice of whether to merge your original photos or the edited versions.
Merge by Exporting and Importing
This final option is conceptually simple. You export all the photos from one library and then import them into another. It’s even what Apple recommends. The main thing it has going for it is that it’s free, and it will be faster than the iCloud Photos approach. It could also be useful if you want to copy a subset of photos between libraries, rather than merging all photos.
However, as with PowerPhotos, you have to choose between original and edited photos, and you’ll need a lot of extra disk space. Even worse, you’ll lose even more metadata, including albums, faces, and print projects. And if you export as JPEG, your photos may also suffer a slight quality drop as they’re recompressed.
For those who want to use this approach, Apple provides detailed instructions. In essence, you’ll click Photos in the sidebar to see everything, and then choose Edit > Select All. Then you’ll choose File > Export and either Export X Photos (to get the edited versions of images) or Export Unmodified Original for X Photos (to get the original images). Once everything has exported, you’ll switch libraries in Photos and then drag the folder of exported images back into Photos to import it.
Our nod goes to the iCloud Photos technique, but PowerPhotos is a fine utility for those who aren’t perturbed by its limitations. Of course, don’t start any merging without making backups first, and if you need help, don’t hesitate to call us.
Social Media: If you want to merge Photos libraries to avoid having to switch back and forth, there are several approaches you can take, but each comes with pros and cons. See them all at:

Running Low on Space on Your Mac? Here’s How to Clear Unnecessary Data
Photos Not Syncing between Devices Properly via iCloud Photos?
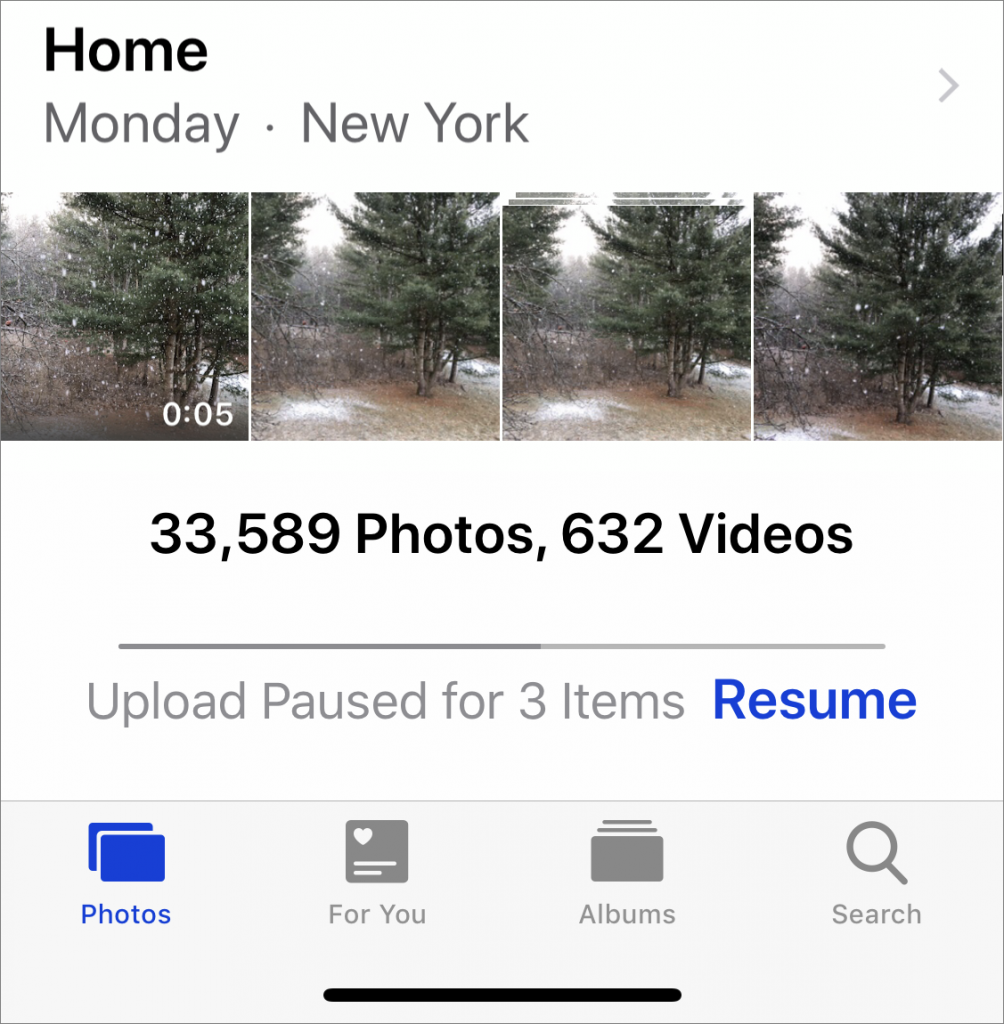
iCloud Photos (which Apple previously called iCloud Photo Library) is wonderful when it’s working. Take some photos on your iPhone, and they appear on your Mac and iPad a minute later. Delete unnecessary shots and edit the others on your Mac, and your iPhone and iPad reflect those changes almost immediately. But what if changes aren’t syncing? Photos in iOS and macOS can pause syncing for a variety of reasons, and sometimes it doesn’t restart when it should. To see if this is happening, go to the very bottom of the Photos view in Photos, where it lists the number of photos and videos you have stored. Below that number is the sync status. If it has a reason and a Resume link, click or tap Resume to start it again.
Did You Know Families Can Share Mac and iOS Apps Purchased from the App Store?
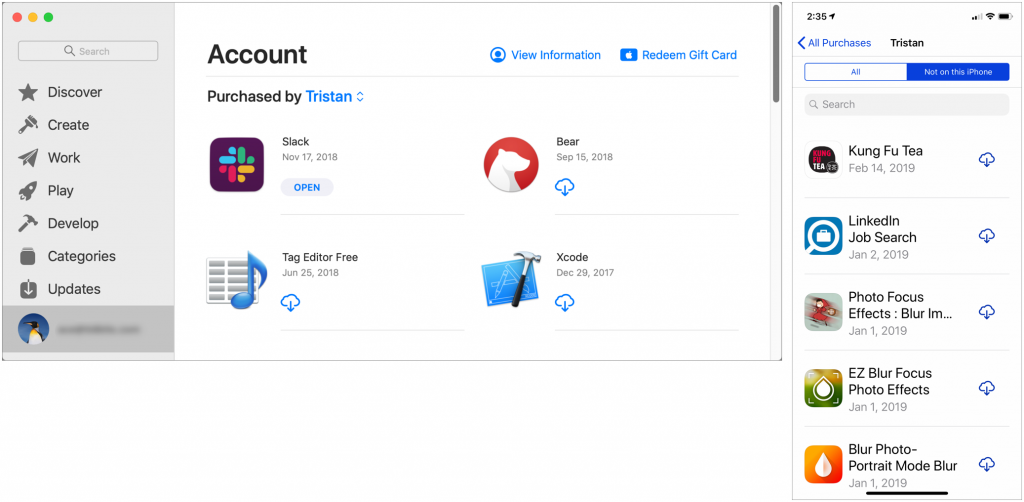
Have you ever looked over your spouse’s shoulder and thought, “Hey, that’s a cool app.”? If you set up Family Sharing (in System Preferences > iCloud on the Mac, and in Settings > Your Name in iOS), you can download almost any app that someone else in your family has purchased on either the Mac App Store or the iOS App Store. How you find these shared apps depends on the platform. On a Mac running macOS 10.14 Mojave, open the App Store app, click your email address at the bottom of the sidebar, and then click the name next to “Purchased by” to see another family member’s purchases. In iOS 12’s App Store app, tap your icon at the upper right, tap Purchased, and then tap a family member to see their purchases (note that you can select Not on this iPhone/iPad to narrow the choices). Click or tap the cloud icon to download a purchased app.
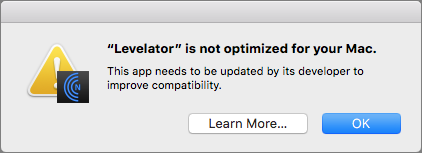
What’s with All These Dialogs Saying, “SomeApp is not optimized for your Mac”?
If you’re running macOS 10.13.4 High Sierra or macOS 10.14 Mojave, you may have seen a dialog that says an app isn’t optimized for your Mac. The message differs slightly between High Sierra and Mojave, with the High Sierra version telling you the developer needs to update the app to improve compatibility whereas Mojave saying bluntly that the app won’t work with future versions of macOS.

What’s going on here, what should you do, and when should you do it?
What’s Going On: 32-bit and 64-bit Apps
Over a decade ago, Apple started to transition all the chips used in Macs, along with macOS itself, from a 32-bit architecture to a 64-bit architecture. Without getting into technical details, 64-bit systems and apps can access dramatically more memory and enjoy significantly faster performance.
Apple knew it would take years before most people were running 64-bit hardware and 64-bit-savvy versions of macOS, so it allowed macOS to continue running older 32-bit apps. However, maintaining that backward compatibility has a cost, in terms of both performance and testing, so at its Worldwide Developer Conference in 2017, Apple warned developers that High Sierra would be the last version of macOS to support 32-bit apps “without compromise.” At the next WWDC in June 2018, Apple announced that macOS 10.14 Mojave would be the last version of macOS to run 32-bit apps.
Happily, the only “compromise” for 32-bit apps in Mojave is the warning dialog, which appears every 30 days when you launch an older app. But the writing is on the wall: 32-bits apps will cease working in macOS 10.15.
How Do You Identify 32-bit Apps?
Apple provides a tool to help you find 32-bit apps. Follow these steps:
- From the Apple menu, choose About This Mac and then click the System Report button.
- In the System Information utility that opens, scroll down to Software in the sidebar and select Applications. It may take a few minutes to build the list of every app on all mounted drives.
- When it finishes, click the 64-bit column header (No means 32-bit; Yes means 64-bit) to sort the list, and select an app to see its details in the bottom pane.


This technique works in both High Sierra and Mojave, but in Mojave, System Information includes a better-formatted section, called Legacy Software, that also provides a list of 32-bit apps. However, this list may be smaller because it includes only those apps that you’ve launched. Since it’s likely that you open old 32-bit apps only occasionally, you can’t trust the Legacy Software list to be complete.

If you find System Information’s Applications list overwhelming, check out the free 32-bitCheck utility from Howard Oakley. It performs exactly the same task but lets you focus on a particular folder and save the results to a text file for later reference.

What’s Your Next Step?
Once you know which apps won’t work in macOS 10.15, you can ponder your options. Luckily, you have some time. We expect Apple to release macOS 10.15 in September 2019, but you don’t need to upgrade right away—in fact, we recommend that you wait a few months after that to allow Apple time to fix bugs.
That said, we do encourage upgrading eventually, and if you buy a new Mac after September 2019, it will come with macOS 10.15. So you need to establish a plan—it’s better to know what you’re going to do than to be forced into action if you have to replace your Mac on short notice. For each 32-bit app on your Mac, you have three options:
- Delete it: It’s not uncommon to have old apps that you haven’t used in years and won’t miss. There’s no need to waste drive space on them in macOS 10.15.
- Upgrade it: Apps in active development will likely have a new version available. The main questions are how much the upgrade will cost and if there are compatibility issues associated with upgrading. You can upgrade at any time, although it’s likely worth waiting until you’re ready to move to macOS 10.15 to minimize costs. The apps that cause the most irritation here are things like the Adobe Creative Suite—Photoshop, Illustrator, and InDesign—that require switching to a monthly subscription.
- Replace it: If no upgrade is available, the cost of upgrading is too high, or upgrading comes with other negatives, it’s time to look for an alternative. This can take some time, so it’s worth starting soon to ensure that the replacement will provide the features you need before macOS 10.15 forces the decision.
Needless to say, if you’d like recommendations about how to proceed with any particular app or workflow, get in touch with us!
Social Media: Have you seen dialogs warning that an app isn’t optimized for your Mac? Here’s what’s going on, what you should do, and when you should do it:
Look before You Leap with Safari’s Link Preview
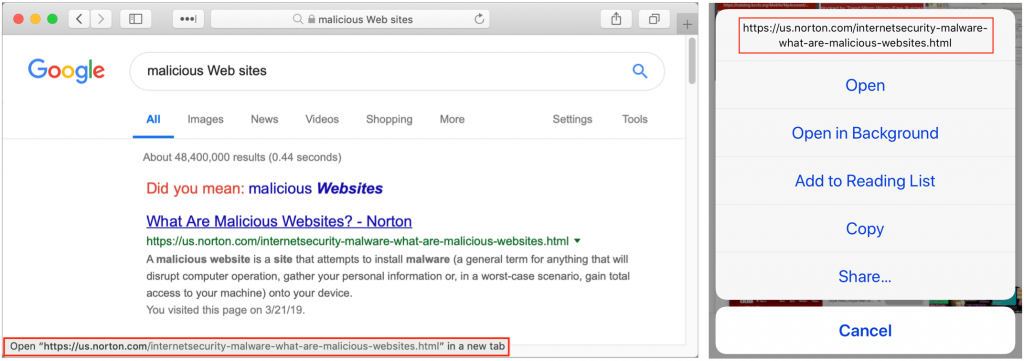
When you follow a link in Safari, you generally don’t know where you’re going to end up. That’s fine most of the time, but what if you’re concerned that a site might be trying to trick you into going somewhere malicious? Safari provides an easy way to look at the URL under a link. On the Mac, choose View > Show Status Bar, hover your pointer over the link, and look at the bottom of the window. In iOS, touch and hold a link (don’t press for 3D Touch) until a popover appears, showing the link and giving you options for opening it. The most important thing to look at is the domain—us.norton.com in the screenshots. It should match where you think you’re going, or at least look reasonable. If the URL is dubious, don’t follow the link.
Collaborate with Colleagues in Pages, Numbers, and Keynote
We talked last month generally about real-time collaboration and why it’s so efficient and effective—see “Stop Mailing Files Around and Use Collaborative Apps.” Now we’re going to explain how to start collaborating in Apple’s iWork suite of apps: Pages, Numbers, and Keynote. Happily, the basics are similar in all three apps.
We’ll focus on the Mac versions here (make sure you have the latest updates!), but note that the iOS versions can participate as full-fledged collaboration citizens (Apple has more details). It’s even possible to use the iCloud versions of these apps for collaboration, but with some limitations (notably that Pages documents with tracked changes can only be viewed, not edited, in iCloud).
Invite Collaborators
Once you have a document you want to share, the first step is to invite your collaborators. Choose Share > Collaborate with Others, or click the Collaborate button in the toolbar.
The document must be stored in iCloud Drive (or the Box file sharing service), and the iWork apps will automatically move the file there if need be. To find the file later, choose Go > iCloud Drive in the Finder and look in the folder associated with the app you’re using.
Next, the app displays the Add People dialog, where you can choose with whom you’re going to share the document, how to send the invitation, and what permissions to set.

The Share Options are important. First, you can limit access to “Only people you invite” or “Anyone with the link.” With the former, the invitees must have iCloud accounts and be signed in. With the latter, you can share with anyone, even if they don’t use Apple devices.
Second, with the Permission menu, you can let collaborators make changes, or if you want them just to see the document, you can restrict them to View Only.
When you’re done, click Share to send the iCloud link via the specified channel (or copy it to the clipboard for sending in whatever way you prefer).
Accept an Invitation
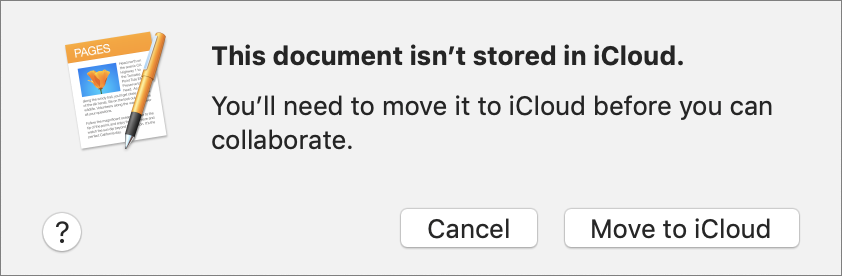
When the recipient clicks the link or clicks Accept in a sharing notification, they get a dialog asking to open the document and telling them where it’s stored, in case they don’t want to work on it right away.

When they open the document, it will look and feel exactly like a normal document in Pages, Numbers, or Keynote.
For someone who isn’t an Apple user, clicking the iCloud URL will open the document in the Web version of the appropriate app on iCloud.com. They’ll need to enter a name to identify them in the document, after which they can work in the Web app.

Add and Change Data
For the most part, you can do anything in a shared document that you can do with a normal document. There a few general limitations, such as managing styles and working with media files over 50 MB, plus some app-specific restrictions, such as working with tables of contents in Pages, transposing tables in Numbers, and changing themes in Keynote. Apple has a full list.
While you’re working, you can see who else is in the document at the same time by clicking the Collaborate button and looking for a colored dot next to a person’s name.

You’ll see color-coded cursors, text, and object selections as other people work, but if that’s distracting, choose View > Hide Collaboration Activity.
It can be hard to be work in a document while seeing someone else making changes, so don’t be shy about hiding collaboration activity. Or, if you are actively working with someone on a particular part of the document, consider doing so while you can talk in person or on the phone.
Add Comments
Commenting is the big win for collaboration with remote colleagues—it can save a vast amount of time to discuss a particular aspect of a document in context. To add a comment, select some text or an object, and then choose Insert > Comment or click the Comment button on the toolbar. (The controls look a bit different in iOS; Apple explains the differences.)
Comments appear as color-coded selections, boxes, or in the case of Numbers, corner triangles in cells. If they’re in the way, you can hide them by choosing View > Comments > Hide Comments. Other commands in View > Comments let you easily navigate to next and previous comments so you don’t have to find them visually.

Other collaborators can click Reply to continue the conversation right within that comment. You can edit one of your comments at any time by clicking to the right of the timestamp and choosing Edit Comment (or Edit Reply). Once the discussion has been resolved, either the person who started the comment thread or the document owner can delete the comment thread by clicking Delete.
Track Changes
Tracking who made what changes to a document is available only in Pages, and it’s hugely helpful when you need editing. Only the document owner can enable the feature by choosing Edit > Track Changes, but once that’s done, the change tracking toolbar appears above the document with controls for navigating between comments and changes, buttons for accepting or rejecting changes, and a button for pausing change tracking. A pop-up menu at the right side lets you configure whether you want to see all changes, changes other than deletions (which is generally the best setting), or what the document will look like in the end. A left-hand sidebar lists all comments and changes—show it by choosing View > Show Comments & Changes Pane.

Anyone with edit access can accept or reject any particular change by clicking Accept or Reject in the Comments & Changes pane; you can also use the buttons in the change tracking toolbar to navigate from change to change, accepting and rejecting as you go. If there’s no need to deal with each change individually, use the pop-up menu’s commands to accept or reject all changes.
Needless to say, you can work on shared documents only when you’re online when you’re using the Mac or iOS version of an iWork app (if you try to edit while offline, the app will only let you edit a copy that is no longer shared). With any iCloud.com documents that you already have open, however, you can work offline, but your changes won’t appear to others until you reconnect.
When you’re done collaborating on a document, click the Collaborate button in the toolbar and then Stop Sharing (below left). Doing so immediately prevents others from making more changes and deletes the document from iCloud Drive on their devices (below right).

Simultaneous collaboration is wonderful when you’re working intensely with other people to develop a presentation, brainstorm budget estimates, or wordsmith a mission statement. In such situations, you’ll want to be able to talk at the same time. But for other sorts of projects, it’s also useful to allow people to collaborate when it’s convenient for them—the important thing is that everyone is working in the same document and can see each other’s changes and comments. If you rely on Apple’s iWork app for word processing, spreadsheets, or presentations, give their collaboration features a try!
Social Media: Did you know that you can use Apple’s Pages, Numbers, and Keynote to work on documents collaboratively with others, even if they don’t use Apple devices? Read on for how to get started with the collaboration features of these apps.