How to Merge Two Similar Folders in the Mac’s Finder
Time Machine Now Offers Daily and Weekly Frequencies
Did You Upgrade to iOS 15? Check Do Not Disturb in Focus Settings
Find Wasted Space with Storage Management
Find Wasted Space with Storage Management
Between photos, videos, music, and downloads, it’s easy to fill up your Mac’s drive, particularly if it has fast but small flash storage. A MacBook Air might have only 128 GB of drive space, and that goes quickly. Numerous utilities exist to help you find and delete unnecessary files, like GrandPerspective, OmniDiskSweeper, and WhatSize, but as of macOS 10.12 Sierra, Apple provides a built-in tool to clean house: the Storage Management window.
Storage Management is hidden inside the System Information app and is most easily accessed by choosing > About This Mac, clicking the Storage button, and then clicking Manage…but wait! Before you click Manage, look at the About This Mac window’s Storage view.
storage-management-about-this-mac

Hover over each colored bar to see how much space is taken up by a particular type of data. The white space at the end of the bar is what’s still available. You can’t do much here, but the view gives you a quick overview of your drive usage.
When you click Manage, System Information launches, and the Storage Management window appears. (You can also open System Information manually and choose Window > Storage Management.) In the sidebar at the left, ignore Recommendations and look at the rest of the categories. They will vary a bit between Macs, depending on what apps you use, but they correspond to the colored bars you saw in the About This Mac window’s Storage view.
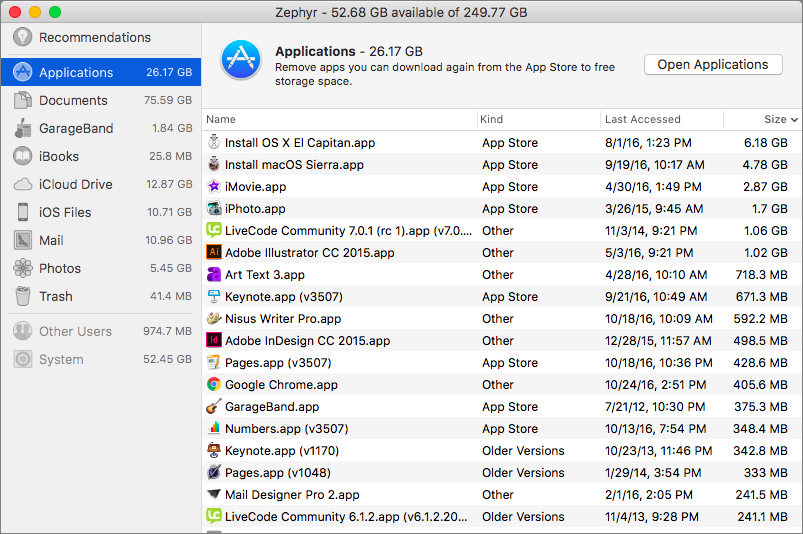
For some, mostly app-specific categories, like Mail and Photos, Storage Management merely tells you how much space the app’s data occupies and lets you either enable space optimization (downloading only recent attachments for Mail, and keeping only optimized photos on the Mac) or if that has been done already, open the app. To save more space, you must delete unnecessary data from within the app itself.
More interesting are the Applications, Documents, and iOS Files categories, all of which may contain gigabytes of unnecessary data. iOS Files, for instance, shows any device backups and software updates that are stored on your Mac’s drive. It’s worth keeping the latest backup of devices you still use, but many people have older backups and unnecessary updates kicking around.
The Applications category shown above lists your apps and is sorted by size by default. But try clicking the column header for Kind and scrolling down. You can probably delete most apps tagged as Duplicates or Older Versions. Similarly, click the Last Accessed column header to see which apps you haven’t launched in years. Many of them can probably go too. Plus, you can redownload anything tagged as coming from the App Store, so you can toss those apps if you want.
In Documents, you’ll see three buttons: Large Files, Downloads, and File Browser. Large Files focuses on files over 50 MB in size, Downloads shows you the contents of your Downloads folder (much of which you likely don’t need), and File Browser gives you a column view that’s sorted by file size and shows sizes next to each item. It’s great for trawling through your drive to find see what’s consuming all that space.
storage-management-documents
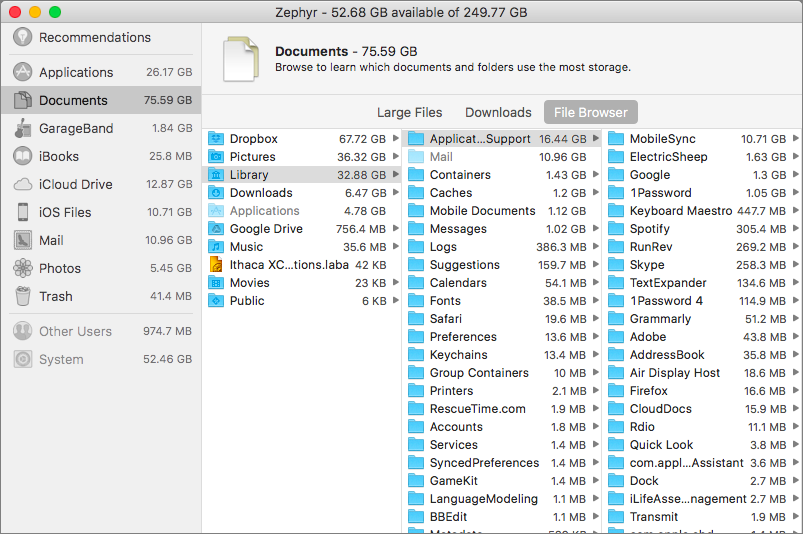
In any of these views other than File Browser, hover over any item and you see an X button for deleting the file and a magnifying glass button that reveals the file in the Finder. To delete multiple files at once, just Command-click or Shift-click to select them and then press the Delete key to remove them all at once. Storage Management gives you the combined size of all the selected files and warns you before deleting the files, so you can use this technique to preview how much space a multi-file deletion will save. In File Browser, select one or more files and either drag them to the Trash icon in the Dock, or press Command-Delete.
If your Mac’s drive is filling up—if it has less than 10 percent free space—consider using the Storage Management window’s tools to search out and delete files that are just wasting space.
All-Time most popular tips!
More great tips from the archives…
- Two Secret Key Combos for Forward Delete on the Magic and MacBook Keyboards
- iCloud Photo Library Users: Do NOT Turn Off iCloud
- Ever Wondered Which Words to Capitalize in a Title? Use Capitalize My Title!
- Tips for Setting Up a Comfortable and Effective Home Work Space
- Tips for Better Videoconferencing
- Set Your Preferred Name and Photo for Messages on iOS
- The Fastest Way to Change Wi-Fi Networks in iOS
- What to Put at the End of Your Emails
- Apple Business Manager Is a Win for Apple-Driven Workplaces
- Find Wasted Space with Storage Management
- Forrester Research and IBM Studies Show Macs Are Cheaper than PCs
- Being an Apple User Means You’re Not the Product
- How to Ask for Tech Support So You Get Good Answers Quickly
- Apple Business Manager Is a Win for Apple-Driven Workplaces
What’s the Deal with Apple’s New Messages in iCloud Feature?
When Apple first announced macOS 10.13 High Sierra and iOS 11, one of the promised features was Messages in iCloud, a way of syncing your conversations in Messages via your iCloud account. Despite the fact that Messages already tries to sync its conversations between your devices, this feature proved difficult for Apple to deliver, and it didn’t appear until the recently released macOS 10.3.5 and iOS 11.4.
The idea behind Messages in iCloud is that it, as the name suggests, stores your conversations and their attachments in your iCloud account, rather than on each device individually. That’s a win because it can offload non-trivial amounts of data to iCloud, freeing up more space on that 16 GB iPhone.
Because the primary source of Messages data is in iCloud, the conversations should also sync perfectly and more quickly than in the past, something that was often frustrating when conversations didn’t quite match up across device. (iOS 11.4 also fixes a bug that could cause some messages to appear out of order.) Even better, deleting a conversation or attachment on one of your devices deletes it from all of them.
The main thing to be aware of before enabling Messages in iCloud is that it does count against your iCloud storage space. That said, if you back up your iOS devices to iCloud, removing Messages data from each device—such as your iPad and iPhone—and storing a single copy in iCloud should result in less overall iCloud usage. (And, realistically, if Messages in iCloud would make you need a higher tier of iCloud storage, you were probably going to need to upgrade soon for other reasons anyway.)
Enabling Messages in iCloud is simple.
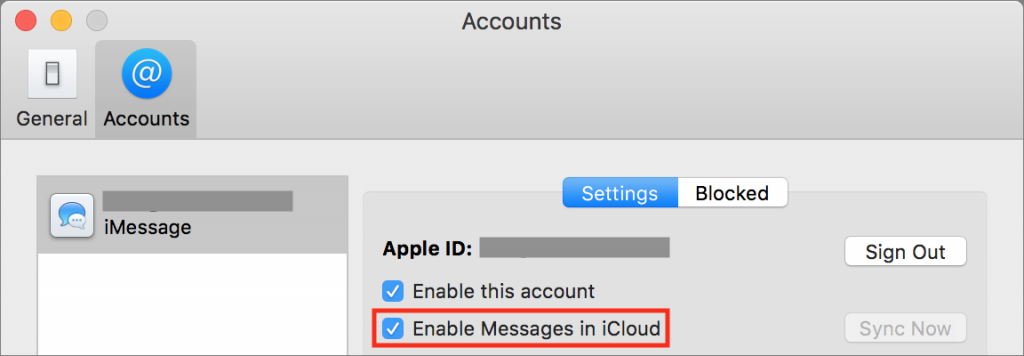
- On the Mac, open Messages > Preferences > Accounts and select the Enable Messages in iCloud checkbox.

- In iOS, go to Settings > Your Name > iCloud, and turn on Messages.
There are three quirks to be aware of:
- You won’t be able to enable Messages in iCloud unless you’ve enabled two-factor authentication for the Apple ID associated with your iCloud account. It’s a good idea for security reasons anyway!
- On the Mac, in the Messages account preferences, there’s a Sync Now button you can click if, for some reason, Messages hasn’t synced automatically. We don’t yet know if or when that will be necessary.
- When you first enable Messages in iCloud in iOS, you may see a note at the bottom of the screen saying that uploading to iCloud requires the device to be plugged in and connected to Wi-Fi. That’s necessary only for the first big upload.

Should you wish to turn off Messages in iCloud, be aware that it may take some time for each device to download all the messages.
For most people, Messages in iCloud is a no-brainer. Its syncing works the way you’d expect, complete with quick updates and universal removal of deleted conversations. The main reason you might not want to enable the feature is if you have only the free 5 GB of iCloud storage and aren’t interested in paying for more space.
Social Media: With macOS 10.13.5 and iOS 11.4, Apple finally delivered the long-promised Messages in iCloud feature. What’s the point of it, and should you turn it on? Here’s the answer:
New MacBook Pros Provide More Speed and RAM, plus a Quieter Keyboard and Hey Siri
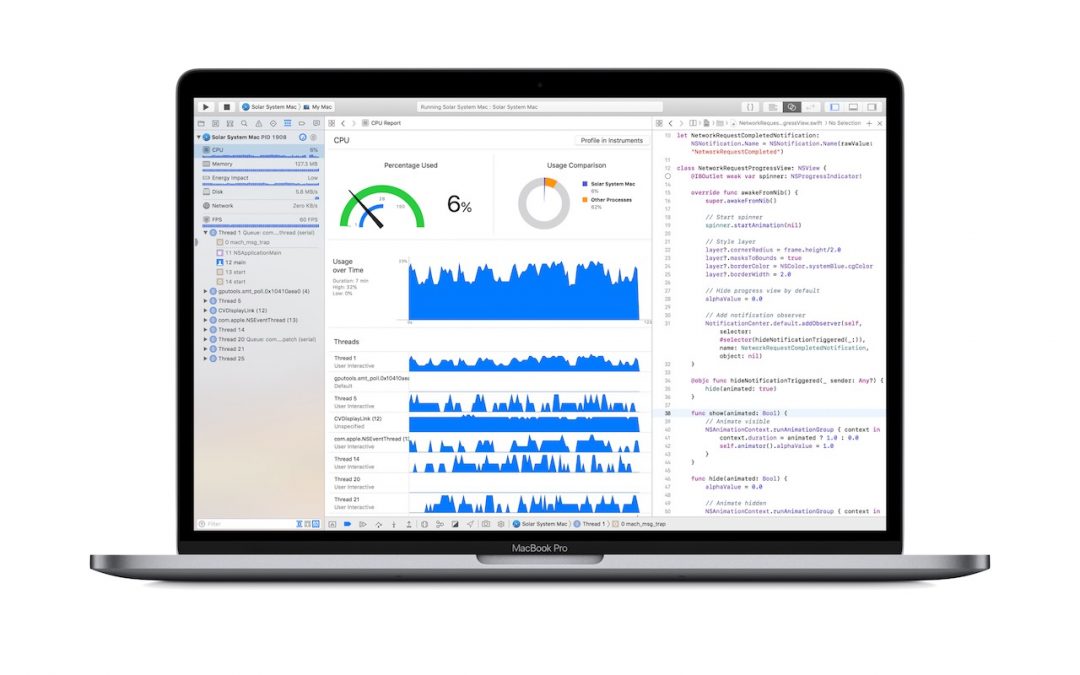
As students prepare to head off to college, Apple has updated the Touch Bar-equipped MacBook Pro line to provide even more powerful options for students and professionals alike. The changes are primarily under the hood, focusing on faster performance, more RAM, and larger SSD-based storage, but there are a few modest physical changes too, including a quieter keyboard and a True Tone display.

Despite these improvements, pricing remains the same as for last year’s models.
The 13-inch MacBook Pro that has function keys instead of a Touch Bar remains the same, as do the 12-inch MacBook and 13-inch MacBook Air.
Performance Boosts
The new MacBook Pros move to Intel’s 8th-generation Core i7 and Core i9 processors. Previously, the 13-inch MacBook Pro used dual-core CPUs, but they now get quad-core chips. And the 15-inch models jump from quad-core chips to processors sporting 6 cores. More cores are better because more tasks can be split up between them, preventing one processor-intensive task from bogging down others.
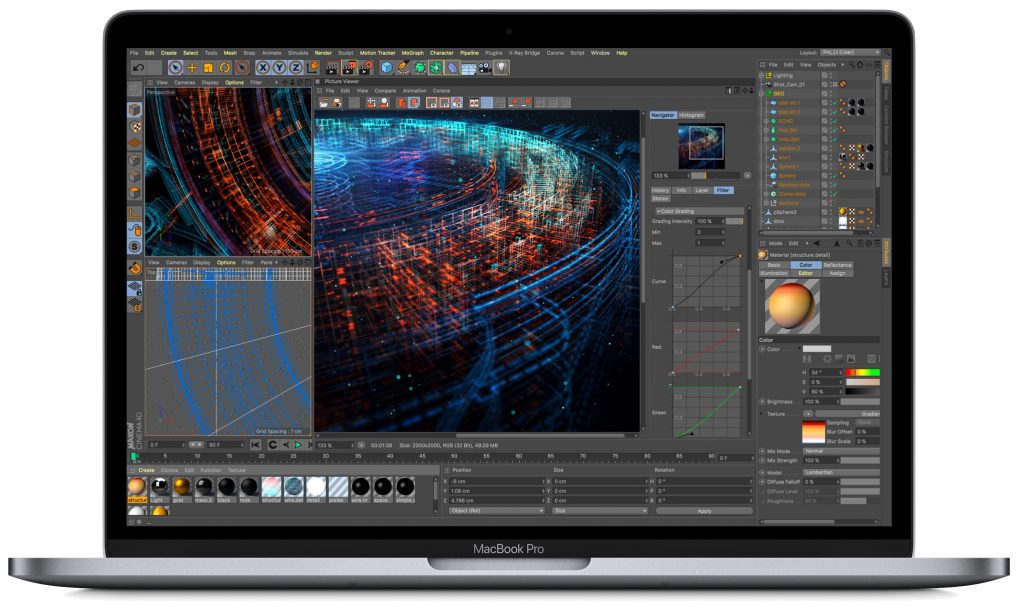
Processing power is just one aspect of overall performance. If your Mac doesn’t have enough RAM for the apps you’re using, it has to fall back on much slower virtual memory. For those who use memory-intensive apps, the new 15-inch MacBook can now take up to 32 GB of RAM, up from a maximum of 16 GB. RAM in the 15-inch models is also DDR4, which is faster and uses less power than the DDR3 RAM used before.
Finally, if you don’t have enough fast SSD storage in a MacBook Pro, you may be forced to store large items like your Photos library and Parallels Desktop virtual machines on a slow external hard disk. The new MacBook Pros can have a lot more built-in SSD storage, but it’s pricey. The 13-inch models max out at 2 TB, which will add $1400 to your bill, and the 15-inch models can go to 4 TB, assuming you have $3400 to spare. The 512 GB ($200) and 1 TB ($600) upgrades are more reasonably priced.
Physical Changes
Apple continues to tweak the controversial butterfly-switch keyboard. Some people haven’t liked the shallow key travel and how much noise it makes, and its keys have a tendency to stick. The new MacBook Pros feature a keyboard that’s quieter and hopefully more reliable.
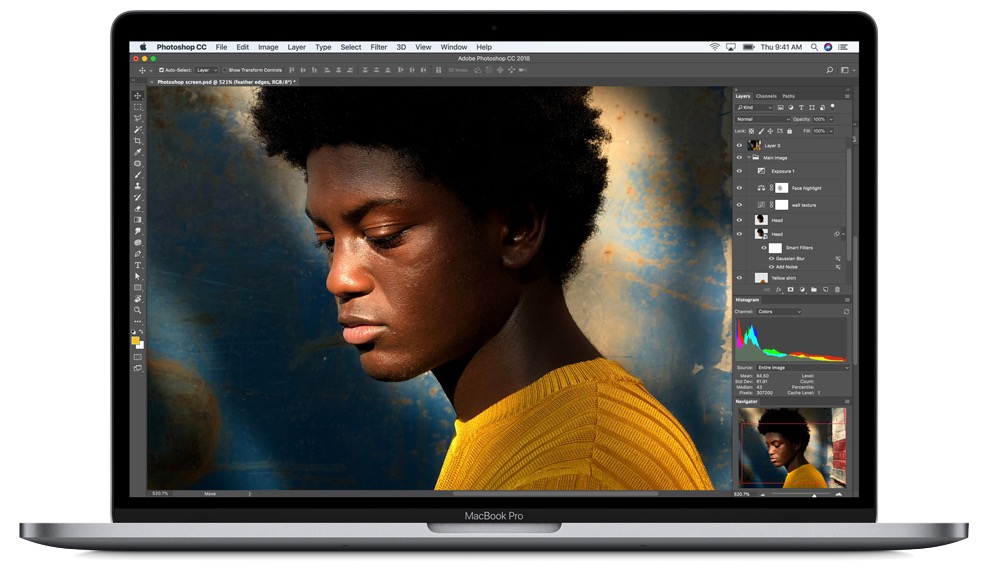
You’ll also notice the new Retina displays with True Tone. First introduced with the iPad Pro and added to the iPhone in 2017, True Tone adjusts the white balance of the screen based on ambient light to make the screen more comfortable to view. It should be particularly appreciated by students working late into the night.
Other Improvements
You know how you can issue commands to Apple’s virtual assistant on your iPhone or iPad by saying “Hey Siri”? That’s possible in the new MacBook Pros also, thanks to the inclusion of Apple’s new T2 chip. The T2 also manages the Touch Bar, facilitates a secure boot feature, and encrypts files on the fly to increase security.
These MacBook Pros are the first to support Bluetooth 5.0, which is backward compatible with Bluetooth 4.2. As Bluetooth 5.0 peripherals become more widespread, they’ll be able to communicate with the MacBook Pro at higher data rates and longer ranges—think of Bluetooth working across your entire house, rather than being limited to a single room.
Price and Availability
The entry-level 13-inch MacBook Pro starts at $1799, and the 15-inch model at $2399. With both models, you can choose between silver and space gray, and they’re available now.
Our take is that, like most of Apple’s speed-bump upgrades, these new MacBook Pros are simply better than the previous models—who turns down better performance for the same price? The True Tone display is also welcome, as is the quieter keyboard. And it’s nice that we can finally talk to Siri without having to hold down a key or click a button.
How to Make the Most of Apple’s New AirPlay 2
For many years now, Apple’s AirPlay feature has made it possible to stream audio from an iOS device or Mac to an AirPlay-enabled speaker, AirPort Express base station, or most recently, a HomePod. Because AirPlay transfers sound over a Wi-Fi network, it eliminates the need for stereo wires and lets you put your speakers where you want them.
In June 2017, Apple threw back the curtains on AirPlay 2, saying it would play the same song on multiple speakers (with AirPlay 1, this is possible only in iTunes) or play different songs on different speakers. Subsequently, Apple released the HomePod, promising to add multi-room audio and stereo sound with linked HomePods in the future.
Apple recently released three updates—iOS 11.4, tvOS 11.4, and HomePod 11.4—with an eye toward delivering AirPlay 2 and these promised features. Once you’ve installed these updates, here’s how to start enjoying AirPlay 2’s improvements.
AirPlay 2 in iOS
To take advantage of the multi-room audio capabilities in iOS, start playing some audio. Then open Control Center, press the audio card to expand it, and tap the AirPlay ![]() button in the upper right. You see a list of available output devices; those that support AirPlay 2 have a circle to the right of the name. Tap one or more of those circles to send the audio to that speaker. If an app has its own AirPlay button, you can also tap that to access the same controls.
button in the upper right. You see a list of available output devices; those that support AirPlay 2 have a circle to the right of the name. Tap one or more of those circles to send the audio to that speaker. If an app has its own AirPlay button, you can also tap that to access the same controls.
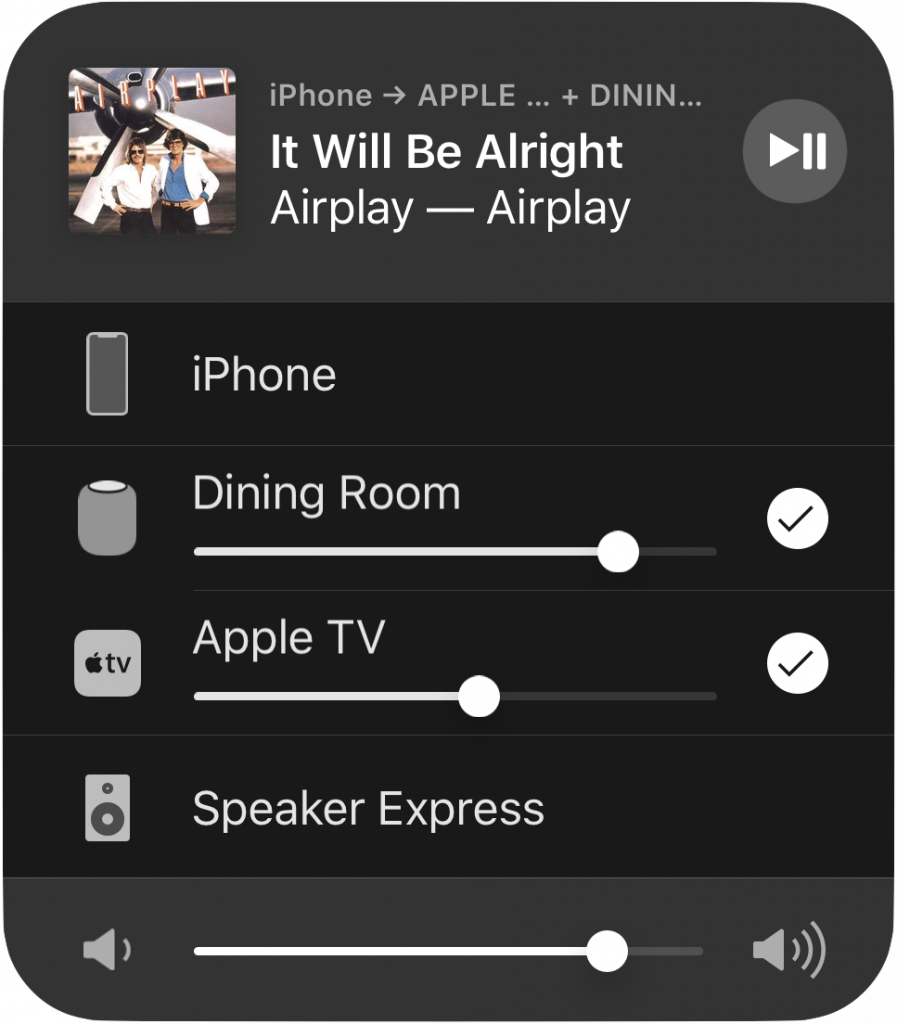
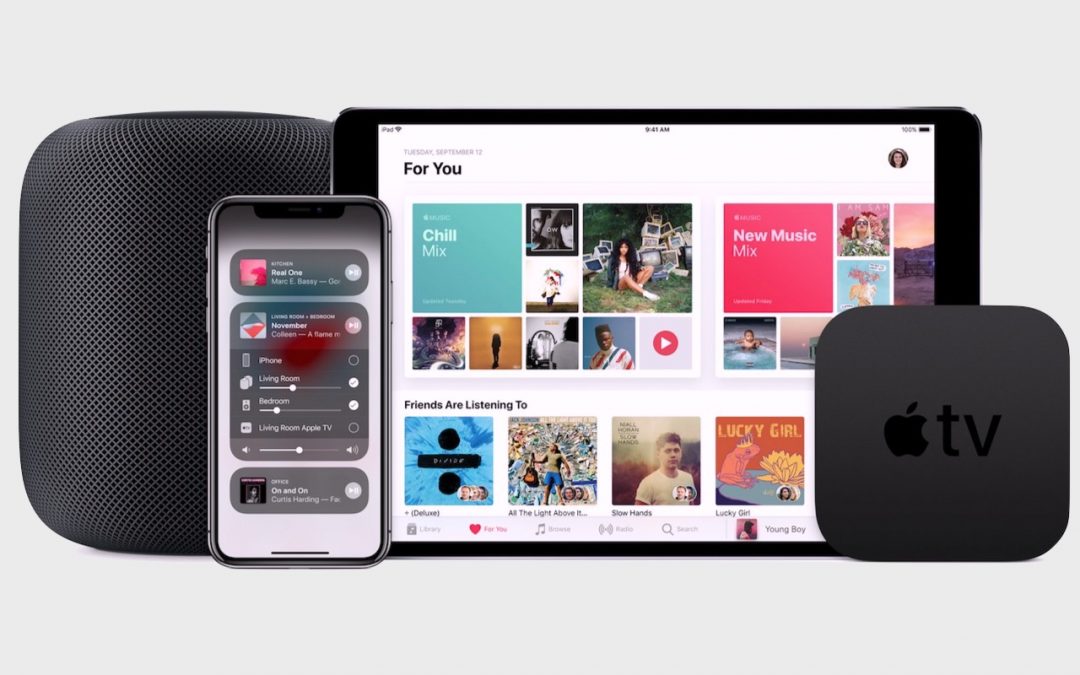
The iPhone can’t play audio simultaneously with an AirPlay 2 speaker, which is why there’s no circle next to iPhone in the image above. Although AirPlay 1 devices—such as the AirPort Express base station (Speaker Express above)—still work singly, they can’t be included in a multi-room set.
AirPlay 2 in tvOS
Once your Apple TV is running tvOS 11.4, it can become an AirPlay 2 speaker, sending audio through your TV, soundbar, or home theater system. It can also broadcast its own audio to other AirPlay 2 speakers.
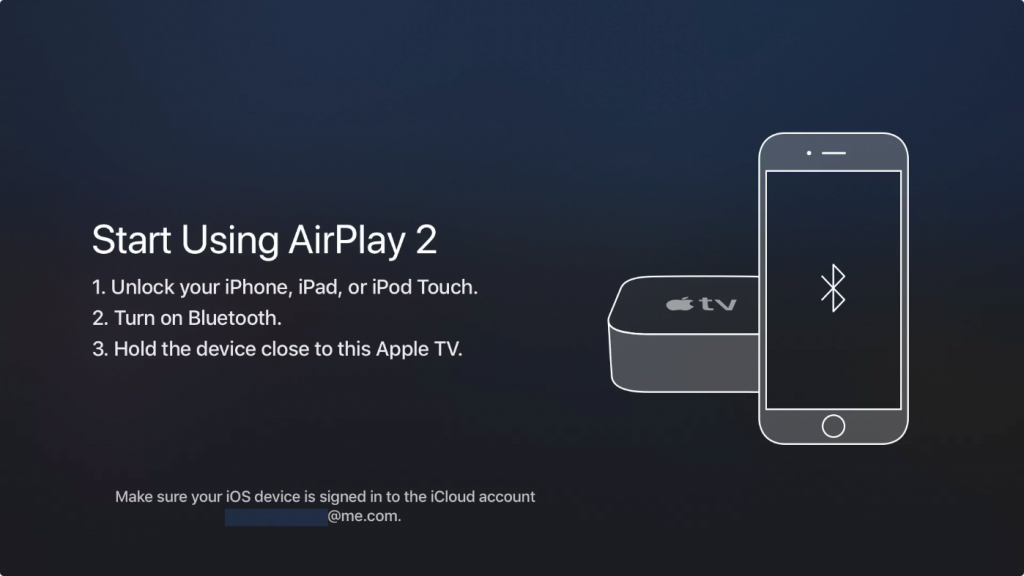
To enable an Apple TV for AirPlay 2, go to Settings > AirPlay > Room, and bring your iPhone or iPad close to the Apple TV. Accept the prompt that appears on the iPhone or iPad, and the Apple TV joins other AirPlay 2 devices associated with your Apple ID.
Once it’s set up, you can send audio from the Apple TV to different speakers. In a video app, swipe down from the top of the Siri Remote, select Audio, and then select one or more speakers (not all video apps offer this feature).

For music, the steps are a little different. Start playing some music and then, from the Music app’s Now Playing screen, swipe up and to the left to highlight the AirPlay ![]() button (if no icons are showing at the top of the screen, press the Menu button to display them). Or—this is much easier!—just press and hold the Play/Pause
button (if no icons are showing at the top of the screen, press the Menu button to display them). Or—this is much easier!—just press and hold the Play/Pause ![]() button on the Siri Remote. Then, as in iOS, select the desired AirPlay 2 speakers with circles to the right of their names by swiping down and clicking the touchpad.
button on the Siri Remote. Then, as in iOS, select the desired AirPlay 2 speakers with circles to the right of their names by swiping down and clicking the touchpad.
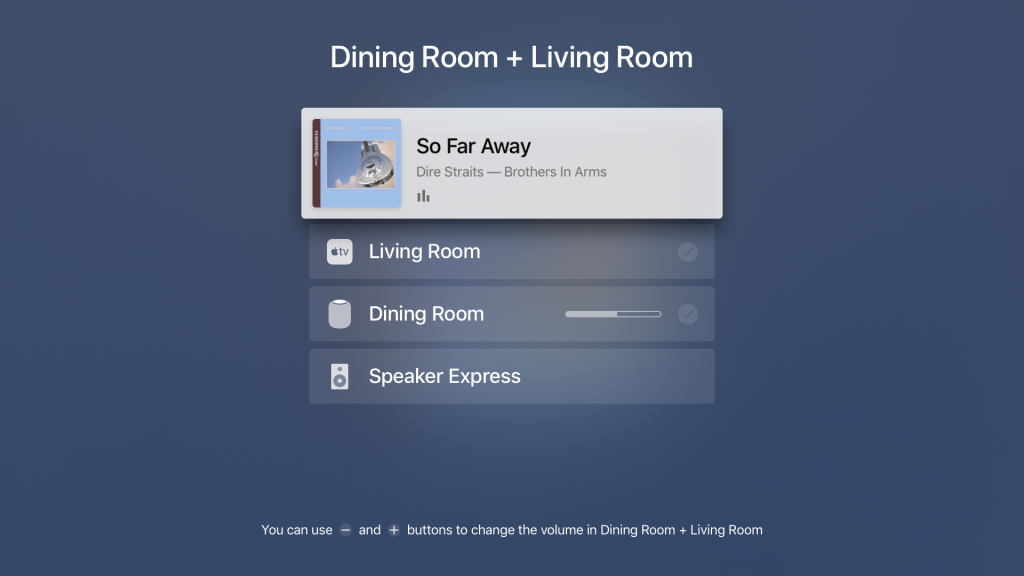
You can also send all Apple TV audio to AirPlay 2 speakers by going to Settings > Video and Audio > Audio Output and selecting the desired speakers.
Other AirPlay 2 Improvements
AirPlay 2 includes a few welcome performance improvements. A larger streaming buffer makes for fewer audio drops, and tighter device syncing provides a faster response when you play or pause the music. Another plus for iOS users is that taking a phone call or playing a game won’t interrupt playback.
Siri works better with streaming audio as well. You can specify which speaker Siri should play through, as in “play David Bowie’s Hunky Dory on Dining Room,” and play the same music through all your speakers with a command like “play the Brandenburg Concertos everywhere.” You can even move audio from one speaker to another—try asking your HomePod to “move the music to the Apple TV.”
AirPlay 2 speakers are now HomeKit accessories, so you can start and stop them in the Home app. That’s about it for now, but we hope a future update will let us integrate audio into HomeKit scenes and automations, so your HomePod could automatically start playing soft jazz when you walk in the door from work.
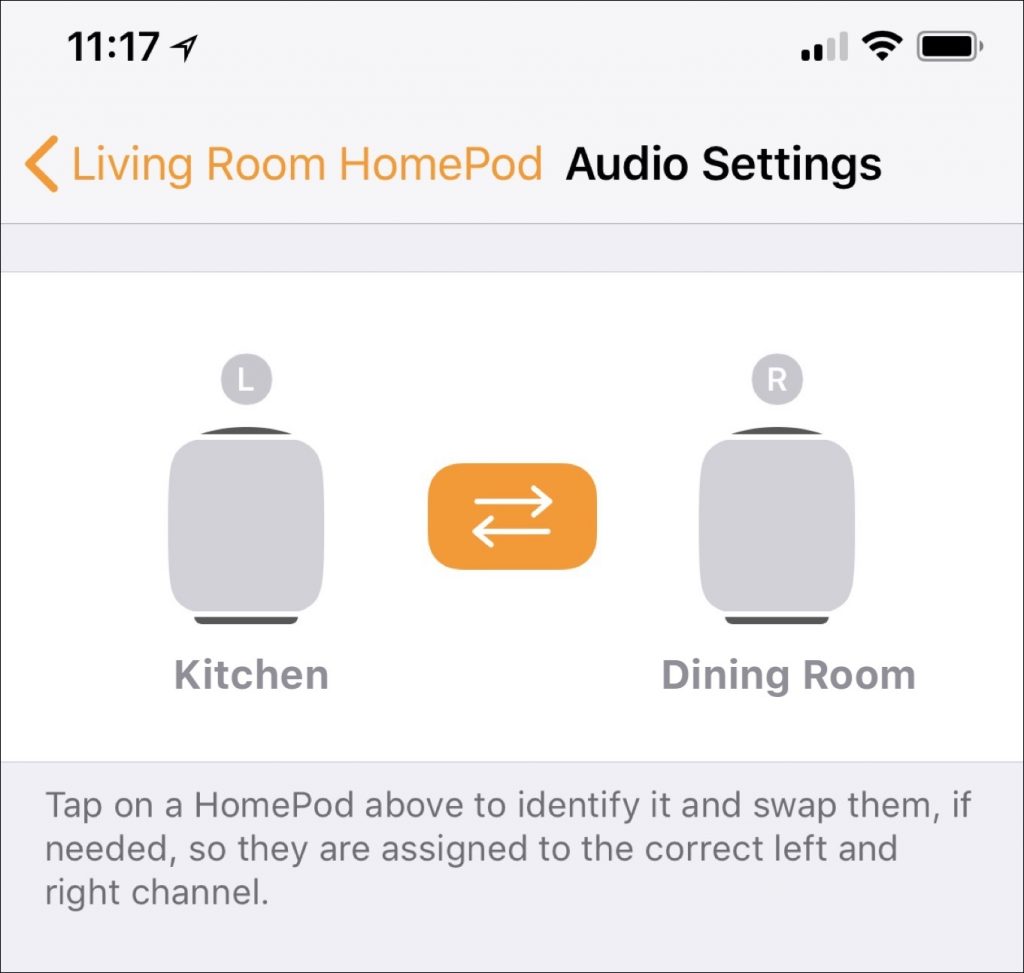
Finally, although it’s unclear whether this feature is part of AirPlay 2, a pair of HomePods can now act as stereo speakers. Once each HomePod is running 11.4, a new option to pair them appears in the HomePod settings in the Home app. Select the HomePods, assign them to the left and right sides, and you can enjoy true stereo music.
It may sound as though all AirPlay 2-compatible speakers come from Apple, but in fact, a wide range of speaker manufacturers—including names like Bang & Olufsen, Bose, Denon, Marantz, Polk, and Sonos—have committed to supporting AirPlay 2, either with updates to existing products or in new speakers. Look for such products later in 2018, and, in the meantime, we hope you enjoy using AirPlay 2 with HomePods and Apple TVs.
Use Copy as Pathname to Help Someone Find a File on the Mac
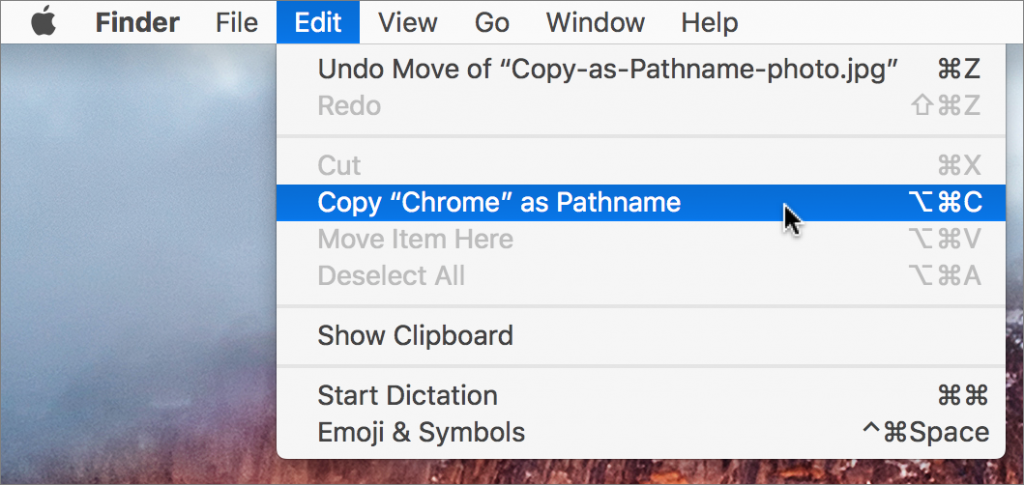
Have you ever needed to write directions for where to find a file on the Mac? That’s easy if it’s in a well-traveled location, like the Music or Pictures folder, but more difficult if it’s in an obscure hidey-hole. Rather than write out instructions like “Look in the Chrome folder inside Google’s Application Support folder in your user Library folder,” select the item in question, hold down the Option key, and choose Edit > Copy “ItemName” as Pathname. (A pathname, or path, is the sequence of nested folders that holds a file or folder, such as /Users/adrian/Library/Application Support/Google/Chrome.) Then paste the path into an email message or word processing document (or wherever you like). You’ll now have the entire thing exactly where you need it, and you don’t have to worry that you’ve accidentally left out a navigational step.
How to Recover Space by Offloading Unused Apps in iOS 11
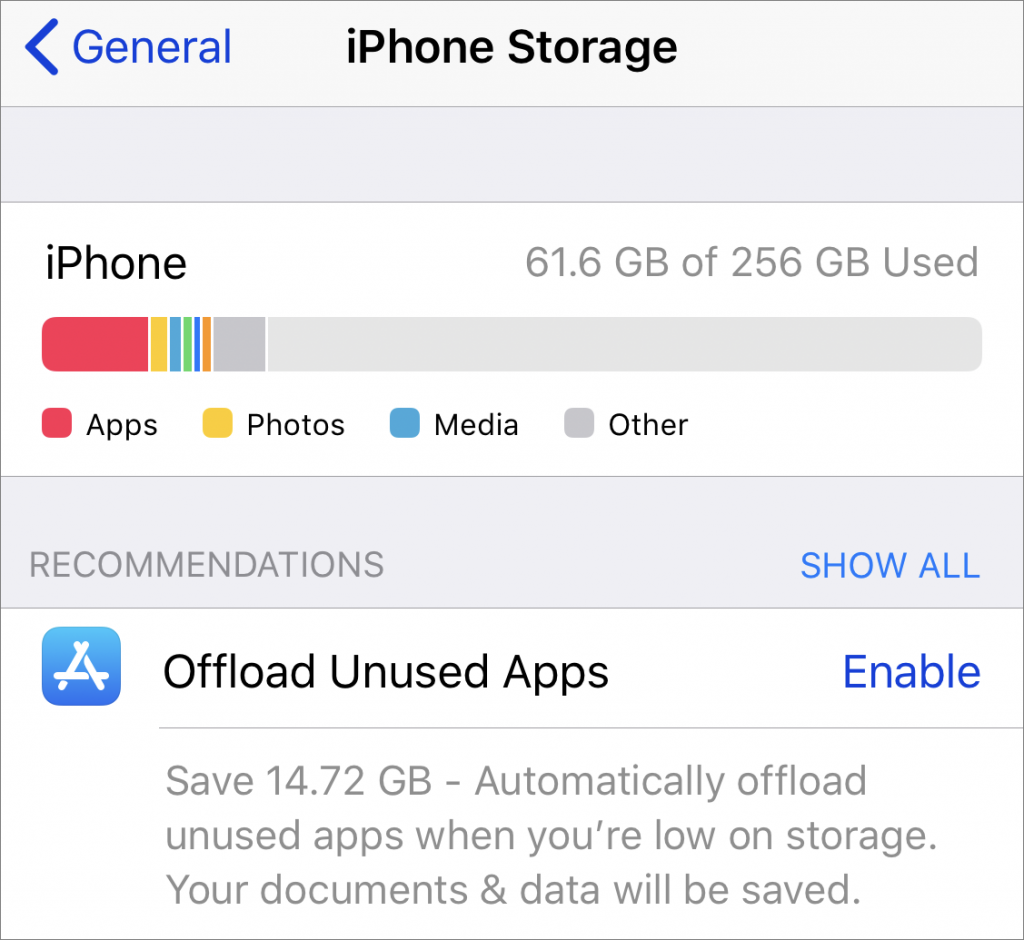
Running low on space on your iPhone or iPad in iOS 11? This problem may be easier to deal with than you expect because Apple has added a quick way to free up storage space by removing unneeded apps. Go to Settings > General > iPhone/iPad Storage, where you’ll see a Recommendations section. This section may include an option to Offload Unused Apps with an estimate of how much space you could save. Tap Enable to allow iOS to remove apps that you haven’t launched in a while—this happens only if you’re low on space. iOS preserves any documents or data associated with the offloaded app, and the app’s icon remains on the Home screen, with a cloud badge. Tapping the app icon reloads it from the App Store, assuming it’s still available. If you find yourself waiting for apps to reload often and you can clear space in other ways, you can disable the feature in Settings > iTunes & App Store > Offload Unused Apps.
View Notes in Their Own Windows, and Float Them Over Everything Else
Here’s one for those who use Apple’s Notes app for storing bits of information. By default, Notes in macOS gives you a single window, with each note listed in a sidebar. But what if you want to see two notes at once? Or keep one always available no matter what else you’re doing? Select the desired notes in the sidebar by Command-clicking them, and then choose Window > Float Selected Notes to open them in their own windows. Or, just double-click them in the sidebar! Then, to make sure one or more of those windows is never obscured by another app, make it active and then choose Window > Float on Top. It’s still a normal window that you can move and resize and close, but no other app will appear over it. See how Safari is the frontmost app below, but the Notes window is on top?


