Dragging files and folders around is core to the Mac experience—drag a file from one folder to another to move it, drag a folder from one drive to another to copy it. But did you know that if you hold down the Option key while dragging a file in the Finder, you’ll get a green + pointer and it will make a copy in the destination? That’s easier than duplicating, moving, and renaming the file. Similarly, if you want to move a large folder from one drive to another, hold down the Command key during the drag to do in one step what would otherwise require copying, trashing, and emptying the Trash. Finally, if you want an alias, hold down the Command and Option keys while dragging, and presto, the original stays put and an alias appears in the destination.
10 Things You Need to Know about Apple’s New HomePod Speaker
After months of anticipation, Apple’s new HomePod smart speaker finally shipped in mid-February. Reviews of its audio quality have been positive, and for the most part, it works both as advertised and as you’d expect. However, there were some surprises, most good but some bad. Whether you have a HomePod on your credenza (which may be a bad spot for it!) or you’re still deciding if you want to buy one, here are ten things you should know:
- Furniture rings. Let’s get this one out of the way. The HomePod can leave rings on oil-finished wood furniture because the silicone base can react with certain wooden surfaces. That has to be embarrassing for a company that prides itself on materials expertise like Apple. The solution is easy—just put something under it.
- Single user. Anyone in the room can give Siri commands, but when it comes to account-based connections, the HomePod is a single-user device. So if you set it up, which is astonishingly easy, it will connect to your Apple Music account, your iMessage account, your iCloud account for Reminders, and so on. That’s fine for you, but your family members won’t be able to access their Apple Music playlists, for instance.
- Speakerphone. The HomePod may be the best speakerphone you’ve ever used. Alas, you can’t initiate a call on it, but once you start one on your iPhone, you can transfer the call by tapping the new Audio button that replaced the Speaker button in iOS 11.2.5 and selecting the HomePod.
- Apple Music. The HomePod can act as an AirPlay speaker, and can thus play audio from your other Apple devices. But when you control it via Siri, the music must come from Apple Music, your iTunes Store purchases, or be matched in your iCloud Music Library. To send Mac audio from apps other than iTunes to the HomePod, get Rogue Amoeba’s Airfoil.
- Audio power. It may be small, but the HomePod has plenty of power. At 6 feet, we measured the sound output at 100% volume at 80 decibels, which is louder than is comfortable.
- Volume control. Speaking of volume, you control it by percentages, as in “Hey Siri, set the volume to 15 percent.” You can also tap the + and – buttons on the top of the HomePod to adjust the volume in 5% increments.
- Electrical usage. The HomePod may be turned on all the time—it has no power switch—but it uses very little electricity. In our testing, it used 2.5 to 3 watts when it was idle but has been used recently, and 4 to 7 watts when playing. Leave it alone in a quiet room for a while, and its power usage drops to 0 watts with just an occasional 1.5-watt spike.
- Good listener. The HomePod hears your commands remarkably well, even when it’s playing music at a high volume. You shouldn’t have to shout at it.
- Hey Siri. If you’re within earshot of a HomePod and want to give Siri a command on your iPhone or Apple Watch, don’t say “Hey Siri” right away. Instead, to use your iPhone, unlock it first. Or, to use your Apple Watch, raise your wrist. Apple has an explanation of how Hey Siri works with multiple devices.
- Apple TV. You can play audio from your Apple TV through your HomePod. On the main screen of the Apple TV, press and hold the Play/Pause button on the Siri Remote, and then select the HomePod before playing a show. Or, while playing video, swipe down on the Siri Remote, swipe right to select Audio, and then select your HomePod in the Speaker list.
Once you’ve transferred audio to the HomePod, you can use Hey Siri commands to pause and play the Apple TV content, change volume, and even rewind and fast-forward by a certain amount of time (“Hey Siri, rewind 10 seconds”). However, other things that Siri on the Apple TV can do, like tell you who stars in a movie, work only when you press and hold the Siri button on the Siri Remote.
Much as the HomePod works well right now, it stands to improve in the coming year. Apple plans to release software updates that will enable two HomePods in the same room to provide true stereo sound, and that will let you control multiple HomePods simultaneously for multi-room audio.
Apple Pay Is Faster, Easier, More Secure, and More Private Than Using Credit Cards
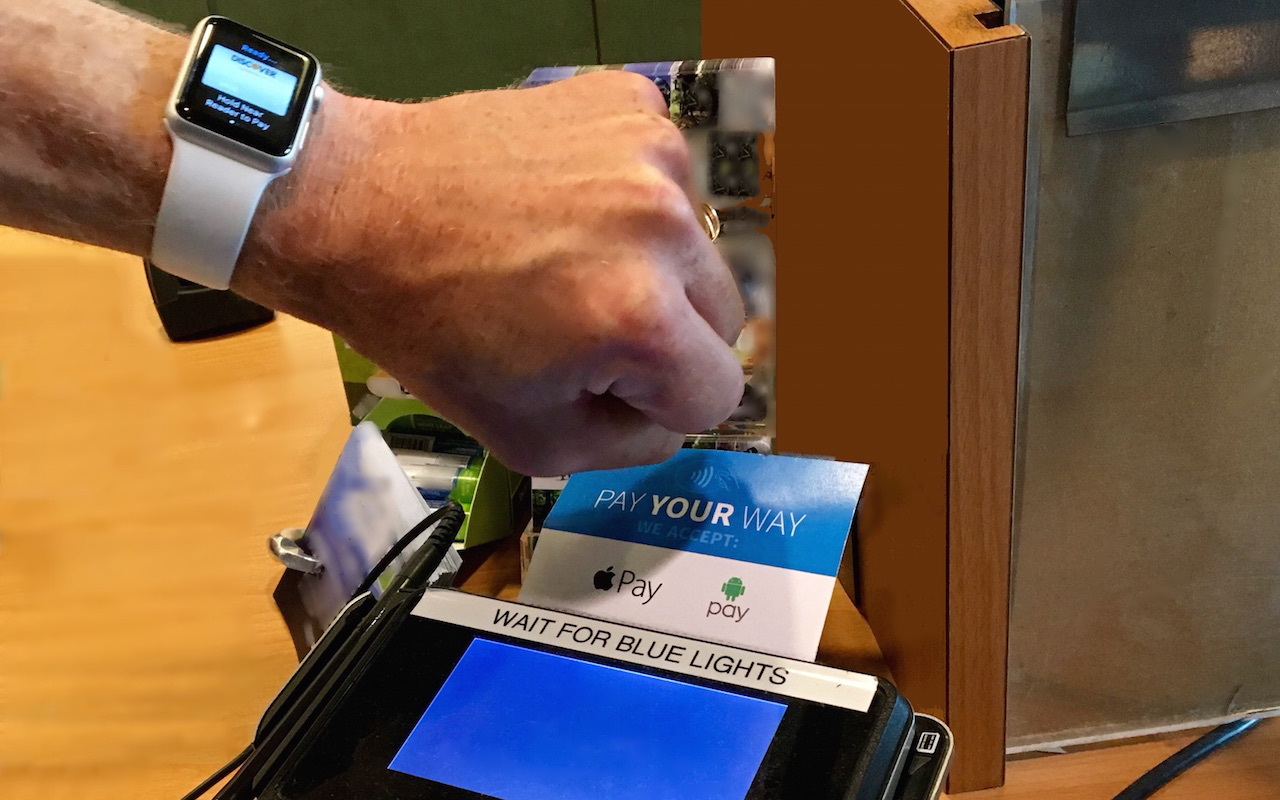
You’ve probably heard of Apple Pay, but have you set it up so you can use it to pay for purchases at checkout? If not, give it a try, since it’s one of those living-in-the future Apple technologies that feels like science fiction every time you use it. Simply put your iPhone, iPad, or Apple Watch within an inch or so of a compatible payment terminal (look for an Apple Pay or contactless payment logo), put your finger on the Home button to use Touch ID (or double-press the iPhone X’s side button and authenticate via Face ID, or double-press the Apple Watch’s side button), and you’re done. The entire transaction takes less time than opening your wallet, although you may still need to sign a receipt.
What happens behind the scenes when you use Apple Pay? The good news is that Apple Pay is significantly more secure than a magnetic-strip credit card and has advantages over chip-embedded cards too. First, theft prevention is baked in. A typical thief can’t use Apple Pay from your device because they can’t get past Touch ID or Face ID, or provide your Apple Watch passcode.
Also, the store where you shop gets no data about you—they don’t know who you are, where you live, what your card number is, or anything else unless you showed a rewards card or provided your phone number. Most importantly, you don’t have to worry about your credit card number being jotted down, scanned, or skimmed.
How does this seemingly magical process work? When you set up Apple Pay, the Wallet app sends your encrypted credit card details to Apple, after which they’re passed along to your card’s payment network. What comes back is an encrypted Device Account Number—a long number that’s stored in the Secure Enclave chip on your device. That chip is protected by a digital moat, keeping it isolated from nearly all activity on your device. The Device Account Number is unique to your device and card, so nobody else can use it.
When you pay with Apple Pay, the Secure Enclave chip transmits the Device Account Number, along with a few other details, including a one-time transaction code. Everything is encrypted, so even if an attacker were listening to the traffic, no transaction details would be revealed. The information remains encrypted until it reaches the appropriate party, at which point, if all goes well, your transaction is approved and processed.
Millions of payment terminals in the United States accept Apple Pay, including those found in most major national chains, so you shouldn’t have to look far to find one. You can also use Apple Pay in some iOS apps and some Web-based shopping carts when checking out in Safari.
To set up Apple Pay, on your iPhone or iPad, tap Settings > Wallet & Apple Pay > Add Credit or Debit Card and follow the easy instructions—it’s fine to let the device scan your card so that you don’t have to type your credit card number; the image is discarded immediately after setup.
After adding a card, find it in the Wallet app and tap the card’s info button at the lower right to explore the Info and Transactions screens. Notice that four digits from the card’s Digital Account Number appear on the Info screen—if you want to return an Apple Pay purchase, you’ll give these digits to the merchant instead of sharing your credit card number.
Finally, starting in iOS 11.2, Apple introduced Apple Pay Cash, which lets you make person-to-person payments within the Messages app. It’s great for splitting restaurant checks!
The bottom line is that Apple Pay is easy to use, preserves your privacy, and enhances your financial security. And you get to feel like you’re living in the future!
iOS 11.3 Introduces New Battery Health Feature, Business Chat, and More
At the end of March, Apple released updates to all four of its operating systems, but iOS 11.3 was the most notable. It boasts a variety of new features and other changes—you can think of it as the midpoint update between iOS 11’s first release and iOS 12, probably coming next September. All remaining updates to iOS 11 are likely to be minor maintenance updates. Here’s what’s new.
iPhone Battery Health
The most anticipated change is the Battery Health feature that Apple promised to add in the wake of revelations that the company was quietly reducing the performance of older iPhone models (starting with the iPhone 6) to lessen the chance of unexpected shutdowns with weak batteries. You find the new Battery Health screen in Settings > Battery > Battery Health, and Apple explains it in detail here.
If your iPhone battery is aging, you may see a lower maximum capacity, and if your iPhone has shut down because of a weak battery, the screen will tell you that performance management has been applied. You can disable performance management, if you prefer the iPhone shutting down to degraded performance, but it will turn on again the next time your iPhone shuts down. Finally, if your battery is bad enough, the screen will recommend replacement.
Also note that iPads running iOS 11.3 can better maintain battery health when they’re plugged into power for long periods of time. Be sure to upgrade if you have an iPad that stays plugged in all the time.
Business Chat
New in both iOS 11.3 and macOS 10.13.4 High Sierra is Business Chat, an Apple service that lets you chat with participating companies directly within Messages. If you look up one of these companies in Maps, Safari, or Search/Spotlight and see a Messages button, just use it to start a conversation. Only you can start conversations, and Business Chat can be a fast way to ask questions, get support, schedule appointments, and even make purchases using Apple Pay.
Apple’s launch partners are 1-800-Flowers, Ameritrade, Discover, Hilton, Home Depot, Lowe’s, Marriott, Newegg, and Wells Fargo, although not all of them seemed to be active out of the gate. And, of course, you can use Business Chat with Apple itself.
Health Records
Most people won’t be able to take advantage of iOS 11.3’s next new feature—medical records in the Health app—right away, but we have high hopes for it. Apple has partnered with over 40 healthcare systems to bring your medical records into the Health app, centralizing them and making them easier for both you and healthcare professionals to access. The records include lab results, medications, conditions, and more. Health Records data is encrypted and protected with a passcode so it remains private.
Data & Privacy
We haven’t yet seen this, but Apple says that iOS 11.3 (and macOS 10.13.4) will display a new privacy icon whenever Apple asks for access to personal information, as it might do to “enable features, secure Apple services or personalize an iOS experience.” The icon should be accompanied by detailed privacy information explaining the situation. In an era when every company seems hell-bent on collecting and exploiting our personal data, it’s nice to see Apple increasing the transparency of its data collection practices.
Safari
iOS 11.3 tweaks Safari in several small ways that make it easier to use and more secure:
- Autofill now inserts usernames and passwords only after you select them on Web pages.
- Autofill now works in Web views within other iOS apps.
- Safari warns you when you interact with password or credit card forms on non-encrypted pages.
- Safari now formats shared articles sent via Mail as though they were in Reader mode.
- Favorites folders now show icons for the contained bookmarks.
Other Improvements
Apple made lots of other minor improvements in iOS 11.3. You can see a full list in the release notes, but those that we find most noteworthy include:
- iPhone X users get access to four new animoji: a lion, dragon, skull, and bear.
- iOS 11.3 adds support for the Advanced Mobile Location (AML) standard, which provides more accurate location data to emergency responders when Emergency SOS is triggered.
- Podcasts now plays episodes with a single tap, and you can tap Details to learn more about episodes.
- Apple Music now streams music videos uninterrupted by ads.
- Apple News has improved its Top Stories feature and includes a new Video group in the For You collection.
iOS 11.3’s improvements may not change the way you use your iPhone or iPad, but they’re welcome nonetheless, and Business Chat and Health Records should become more interesting as additional institutions sign on. And, of course, anyone with an older iPhone should check the Battery Health screen right away.
Super Bad Apple Vulnerability
Hey –
Just wanted to give a heads up that anyone who is one of our support customers can sleep soundly tonight.
Within minutes of reading the breaking news of todays “Root” vulnerability, we had automagically patched all of the “Pro” and Total” support customers machines that were exposed to the vulnerability.
Want some numbers? Ok. Across our fleet of Pro and Total Support users (about 300ish), only 6 machines were vulnerable (2 of them were in our test lab) And by 4:00 pm today, we had a tested and pushed out a fix to all 6.
Why only 6 when we have 100’s under care? Well, thats because we carefully manage macOS and system updates, and except in extreme cases, we have been actively blocking user installs of Mac OS 10.13 High Sierra.
How bad is this vulnerability? Its bad, but someone would need to have access to your computer to do harm. We imagine that Apple will fix it quickly. And likely silently without user intervention.
Of the 300+ users that are on our Basic support plan, about 20 of them had been ignoring our “hold off on upgrading” warnings. Those users had emails in their inboxes within an hour or so that described the steps they needed to take to secure their machines.
Want some more info on the vulnerability?
Here’s what Apple had to say…
“We are working on a software update to address this issue, In the meantime, setting a root password prevents unauthorized access to your Mac. To enable the Root User and set a password, please follow the instructions here: https://support.apple.com/en-us/HT204012. If a Root User is already enabled, to ensure a black password is not set, please follow the instructions from the ‘Change the root password’ section.”
From AppleInsider
“Discovered earlier today, the flaw allows anyone to log in under a Mac’s “root” System Administrator without the need for a password. In practice, the exploit merely requires access to System Preferences, and can be performed in a matter of seconds. Nefarious users can also exploit the bug to bypass a Mac’s lock screen.
Beyond those who have direct access to a vulnerable Mac, the security hole also works remotely in certain scenarios where screen sharing, remote access or VNC sessions are enabled. Users should disable those features until Apple’s update arrives.
As AppleInsider reported when the vulnerability was first aired today, macOS High Sierra users can prevent unauthorized Mac access by disabling the Root User under System Preferences. Alternatively, and as Apple suggests, users can enable the Root account and set a password.
Apple failed to provide a release timeline, but considering the bug impacts system-level directories and is relatively easy to exploit, a software update should be out soon.“
Dial Phone Calls Directly from iOS Calendar Events
Let’s make life easier on the go…
Imagine that you’re adding a calendar event for a meeting with a contractor, and you want to make it easy to call them if you are running late. Or perhaps you want to embed conference call details into an event.
Simply enter a phone number into an event’s Location or Notes field in the Calendar app. Then, whenever you’re viewing the event later on your iPhone, you can tap the number to dial it directly. To add a meeting code to a conference call number, append a semicolon, the meeting code, and the pound symbol—after the iPhone dials the phone number, you can press a button to dial the code at the right moment. The whole thing would look like 518-555-0101;123456#.
For a more automated but potentially error-prone approach, replace the semicolon with one or more commas, each of which causes the iPhone to pause for 2 seconds before dialing the rest of the numbers.
Finally, if you suffer from way too many conference calls, the MeetingMogul app can make dialing in even easier.
A few other posts that might interest you.
More great tips from the archives…
- Two Secret Key Combos for Forward Delete on the Magic and MacBook Keyboards
- iCloud Photo Library Users: Do NOT Turn Off iCloud
- Ever Wondered Which Words to Capitalize in a Title? Use Capitalize My Title!
- Tips for Setting Up a Comfortable and Effective Home Work Space
- Tips for Better Videoconferencing
- Set Your Preferred Name and Photo for Messages on iOS
- The Fastest Way to Change Wi-Fi Networks in iOS
- What to Put at the End of Your Emails
- Apple Business Manager Is a Win for Apple-Driven Workplaces
- Find Wasted Space with Storage Management
- Forrester Research and IBM Studies Show Macs Are Cheaper than PCs
- Being an Apple User Means You’re Not the Product
- How to Ask for Tech Support So You Get Good Answers Quickly
- Apple Business Manager Is a Win for Apple-Driven Workplaces
- The Hidden Dangers of Shadow IT on your business
- Need to Stay in Touch? Try One of These Videoconferencing Apps
- Never Send Someone a Password in Mail or Messages: Do This Instead!
- What Are All These New Privacy Request Dialogs in Mojave?
- The Importance of Productivity Tech for Your Road Warriors
Time for a New Laptop? MacBook Pros Just Got Better.
Apple’s top-of-the-line MacBook Pro notebooks should run a bit more quickly thanks to the addition of Intel’s latest processors running at slightly higher clock speeds. These models also get new graphics processors that improve rendering performance. The 13-inch MacBook Pro still starts at $1299 or $1799 for a model with a Touch Bar and beefier specs. The 15-inch MacBook Pro with Touch Bar starts at $2399.
If you value portability over all else, the MacBook has become more attractive due to improvements that address its previously underwhelming performance. Along with sprightlier CPUs, it has a new SSD that Apple claims is up to 50% faster, and you can now buy it with 16 GB of RAM, up from the previous limit of 8 GB. It’s still a bit pricey for its performance, with two models priced starting at $1299 and $1599.
If you don’t have much to spend, consider the $999 13-inch MacBook Air. Apple gave it a minor speed bump, replacing the stock 1.6 GHz Intel Core i5 processor with a 1.8 GHz version. It remains upgradeable to an Intel Core i7 running at 2.2 GHz.
By the way, if you’ve been jonesing for a full-size wireless keyboard, you’ll be pleased to learn that Apple also just released the new wireless Magic Keyboard with Numeric Keypad. It’s $129.
Call Your Mother: Build Relationships in iOS with Siri
Call Your Mother:
Build Relationships in iOS with Siri
When giving commands to Siri, you can refer to people by relationship, rather than name. So, if you want to call your mother on your iPhone, you can say “call my mother” instead of something like “call Natasha Jauch-Hoechstetter.” But to do this, you need to introduce Siri to your family. First, make sure you have a “card” in the Contacts app for yourself, and then go into Settings > Contacts, scroll down to find and tap My Info, and select your card so Siri knows who you are. Next, make sure you have a contact card for your mother, and then tell Siri, “Natasha Jauch-Hoechstetter is my mother.” Or, if Siri doesn’t hear you correctly, open Contacts, open your card (not your mother’s!), tap Edit, scroll down, tap “add related name,” tap the default relationship to pick “mother,” tap the info “i” icon, select your mother’s card, and tap Done.
11 Ways to Ensure Your iPhone Battery Life Goes to 11
Tips and Tricks for iOS 7
Here are a few of our favorite tips, in no particular order, for optimizing and using iOS 7.
1. Reduce Motion.
It doesn’t look as cool, but it makes the interface feel even a bit quicker. Best of all, it doesn’t make you dizzy. Settings / General / Accessibility / Reduce Motion.
2. Larger Type / Bold Type.
Many people have complained that its a bit more difficult to read with the narrow typeface. Did you know you can make it all larger? Or even just make it bold. Super handy for when you are looking at your phone on the go. Settings / General / Accessibility / Larger Type. Then you can adjust the slider to decide just how much larger you want it. Feel like that isn’t quite enough? Bold Type is right there too. Settings / General / Accessibility / Bold Type.
Note Bold Type setting requires a restart to take effect.