Have you ever looked over your spouse’s shoulder and thought, “Hey, that’s a cool app.”? If you set up Family Sharing (in System Preferences > iCloud on the Mac, and in Settings > Your Name in iOS), you can download almost any app that someone else in your family has purchased on either the Mac App Store or the iOS App Store. How you find these shared apps depends on the platform. On a Mac running macOS 10.14 Mojave, open the App Store app, click your email address at the bottom of the sidebar, and then click the name next to “Purchased by” to see another family member’s purchases. In iOS 12’s App Store app, tap your icon at the upper right, tap Purchased, and then tap a family member to see their purchases (note that you can select Not on this iPhone/iPad to narrow the choices). Click or tap the cloud icon to download a purchased app.
Easier Ways to Move the Cursor When Editing Text on an iPad or iPhone
Use Emergency Bypass and You’ll Never Miss a Call or Text from Important People
There’s little worse than missing an important call or text because your iPhone was in Do Not Disturb mode or because the Mute switch was engaged. If there are certain people—a spouse, parent, or child—whose calls and texts you always want to break through the cone of silence, iOS has a solution: Emergency Bypass. When enabled for a particular contact’s ringtone or text tone, Emergency Bypass ensures the sound and vibration will happen regardless of Do Not Disturb or the Mute switch position. To set up Emergency Bypass, edit the person’s contact card in the Phone or Contacts app, tap Ringtone, and enable Emergency Bypass. You can turn on Emergency Bypass separately for calls in the Ringtone settings and for texts in the Text Tone settings. And remember, you can always set someone’s tone to None and enable a vibration instead to ensure Emergency Bypass doesn’t allow a call to interrupt a movie, play, or concert.
What’s with All These Dialogs Saying, “SomeApp is not optimized for your Mac”?
If you’re running macOS 10.13.4 High Sierra or macOS 10.14 Mojave, you may have seen a dialog that says an app isn’t optimized for your Mac. The message differs slightly between High Sierra and Mojave, with the High Sierra version telling you the developer needs to update the app to improve compatibility whereas Mojave saying bluntly that the app won’t work with future versions of macOS.
What’s going on here, what should you do, and when should you do it?
What’s Going On: 32-bit and 64-bit Apps
Over a decade ago, Apple started to transition all the chips used in Macs, along with macOS itself, from a 32-bit architecture to a 64-bit architecture. Without getting into technical details, 64-bit systems and apps can access dramatically more memory and enjoy significantly faster performance.
Apple knew it would take years before most people were running 64-bit hardware and 64-bit-savvy versions of macOS, so it allowed macOS to continue running older 32-bit apps. However, maintaining that backward compatibility has a cost, in terms of both performance and testing, so at its Worldwide Developer Conference in 2017, Apple warned developers that High Sierra would be the last version of macOS to support 32-bit apps “without compromise.” At the next WWDC in June 2018, Apple announced that macOS 10.14 Mojave would be the last version of macOS to run 32-bit apps.
Happily, the only “compromise” for 32-bit apps in Mojave is the warning dialog, which appears every 30 days when you launch an older app. But the writing is on the wall: 32-bits apps will cease working in macOS 10.15.
How Do You Identify 32-bit Apps?
Apple provides a tool to help you find 32-bit apps. Follow these steps:
- From the Apple menu, choose About This Mac and then click the System Report button.
- In the System Information utility that opens, scroll down to Software in the sidebar and select Applications. It may take a few minutes to build the list of every app on all mounted drives.
- When it finishes, click the 64-bit column header (No means 32-bit; Yes means 64-bit) to sort the list, and select an app to see its details in the bottom pane.
This technique works in both High Sierra and Mojave, but in Mojave, System Information includes a better-formatted section, called Legacy Software, that also provides a list of 32-bit apps. However, this list may be smaller because it includes only those apps that you’ve launched. Since it’s likely that you open old 32-bit apps only occasionally, you can’t trust the Legacy Software list to be complete.
If you find System Information’s Applications list overwhelming, check out the free 32-bitCheck utility from Howard Oakley. It performs exactly the same task but lets you focus on a particular folder and save the results to a text file for later reference.
What’s Your Next Step?
Once you know which apps won’t work in macOS 10.15, you can ponder your options. Luckily, you have some time. We expect Apple to release macOS 10.15 in September 2019, but you don’t need to upgrade right away—in fact, we recommend that you wait a few months after that to allow Apple time to fix bugs.
That said, we do encourage upgrading eventually, and if you buy a new Mac after September 2019, it will come with macOS 10.15. So you need to establish a plan—it’s better to know what you’re going to do than to be forced into action if you have to replace your Mac on short notice. For each 32-bit app on your Mac, you have three options:
- Delete it: It’s not uncommon to have old apps that you haven’t used in years and won’t miss. There’s no need to waste drive space on them in macOS 10.15.
- Upgrade it: Apps in active development will likely have a new version available. The main questions are how much the upgrade will cost and if there are compatibility issues associated with upgrading. You can upgrade at any time, although it’s likely worth waiting until you’re ready to move to macOS 10.15 to minimize costs. The apps that cause the most irritation here are things like the Adobe Creative Suite—Photoshop, Illustrator, and InDesign—that require switching to a monthly subscription.
- Replace it: If no upgrade is available, the cost of upgrading is too high, or upgrading comes with other negatives, it’s time to look for an alternative. This can take some time, so it’s worth starting soon to ensure that the replacement will provide the features you need before macOS 10.15 forces the decision.
Needless to say, if you’d like recommendations about how to proceed with any particular app or workflow, get in touch with us!
Social Media: Have you seen dialogs warning that an app isn’t optimized for your Mac? Here’s what’s going on, what you should do, and when you should do it:
A Quick Trick to Turn Your iPhone into a Magnifying Glass
It’s maddening to want to read a serial number or other bit of fine print that you can barely see. But fret no longer—your iPhone or iPad makes a fabulous magnifying glass! Assuming Magnifier is enabled in Settings > General > Accessibility > Magnifier, you can bring it up by pressing the Home button (for Touch ID devices) or side button (for Face ID devices) three times quickly. If that’s too hard to remember, you can also add a Magnifier button to Control Center in Settings > Control Center > Customize Controls. The special camera viewfinder is zoomed automatically, but you can change the zoom level with the slider, tap the flash icon to turn on the LED light (if available on your device), enable a filter to change the color or contrast, or lock the focus by tapping the lock icon. You can also freeze the image by tapping the white shutter button, which is great for grabbing a picture of a tiny serial number on the back of some device (tap that button again to resume using Magnifier). To leave Magnifier, press the Home button or swipe up from the bottom of the screen.
And YES – Jason Boettcher. I actually use this, because suddenly I have the eyes of a much older man. XOXO- T
Look before You Leap with Safari’s Link Preview
When you follow a link in Safari, you generally don’t know where you’re going to end up. That’s fine most of the time, but what if you’re concerned that a site might be trying to trick you into going somewhere malicious? Safari provides an easy way to look at the URL under a link. On the Mac, choose View > Show Status Bar, hover your pointer over the link, and look at the bottom of the window. In iOS, touch and hold a link (don’t press for 3D Touch) until a popover appears, showing the link and giving you options for opening it. The most important thing to look at is the domain—us.norton.com in the screenshots. It should match where you think you’re going, or at least look reasonable. If the URL is dubious, don’t follow the link.
Block Telemarketing Calls Automatically on Your iPhone
Junk calls are one of the great annoyances of the modern world. You’re minding your own business when your iPhone vibrates in your pocket. You pull it out, curious as to who’s calling, but don’t recognize the number. You may notice that it’s in the same exchange as your phone number, suggesting that it’s a neighbor. But no. When you answer, it’s “Heather,” a pre-recorded voice wanting to sign you up for a resort vacation, give your business a loan, or help with your credit card debt. Angered by the intrusion, you tap the red hangup button, wishing you had an old-style telephone receiver to slam down.
There’s no way to retaliate against these scum-sucking bottom feeders, and the best option is to hang up immediately. For quite a few versions of iOS, you’ve been able to block a caller manually—just tap the i button next to the call in the Recents screen in the Phone app, scroll to the bottom, and tap Block This Caller. But that’s seldom worth doing since telemarketers often spoof the numbers they call from, so it’s unlikely you’d get a second call from the same number.
Instead, we recommend taking advantage of a feature Apple introduced in iOS 10 that enables apps to block calls for you. Quite a few of these apps have appeared, with some of the best reviewed being Hiya, Mr. Number, RoboKiller, and Truecaller. Hiya and Mr. Number are both free and from the same company—Mr. Number is a stripped-down version of Hiya—whereas RoboKiller and Truecaller require an in-app purchase for a monthly membership.
In general, these apps work by receiving caller ID information from iOS and comparing it against both your local contacts (to identify good calls) and a constantly updated database of numbers used by telemarketers (bad calls). Calls from your contacts ring through normally, as do calls from phone numbers not in either of those sets. That’s key, since your doctor might call back from a secondary number, or your kid’s new teacher might call to talk about an upcoming snack day. But if you receive a call from a number known to be used by a telemarketer, the app can either identify it on the incoming call screen or block it automatically, sending it to voicemail.
To enable one of these apps, after you download it from the App Store, go to Settings > Phone > Call Blocking & Identification and enable its switch. You’ll probably also have to do some setup in the app itself, providing your phone number, perhaps creating an account, and determining what should happen with different calls (Mr. Number is shown below, right).
With Hiya and Mr. Number, you can copy a number from the Phone app’s Recents screen (tap the i button for a call, and then press the number to access a Copy button) and then look it up to learn more and see comments other users have made. And if you get a telemarketing call from a number that the app doesn’t recognize, you can submit it to protect others.
RoboKiller claims that it wastes the telemarketers’ time by playing pre-recorded “Answer Bots” conversations to keep them on the line, preventing them from calling more people.
Details vary by app, but the only real downside to using one of these apps is that it may ask for information about you or your contacts to improve its services. If that feels intrusive, investigate one of the apps that requires a membership, like RoboKiller, to see if it better answers your concerns.
In the end, it comes down to how many telemarketing calls you receive each day, week, or month. If you’re lucky and get only one or two per month, it’s probably not worth messing with a call blocking app—maybe just send unidentified (and unexpected) calls to voicemail. But if you’re interrupted by multiple junk calls per day or week, give one of these apps a try and let it reduce the onslaught.
Collaborate with Colleagues in Pages, Numbers, and Keynote
We talked last month generally about real-time collaboration and why it’s so efficient and effective—see “Stop Mailing Files Around and Use Collaborative Apps.” Now we’re going to explain how to start collaborating in Apple’s iWork suite of apps: Pages, Numbers, and Keynote. Happily, the basics are similar in all three apps.
We’ll focus on the Mac versions here (make sure you have the latest updates!), but note that the iOS versions can participate as full-fledged collaboration citizens (Apple has more details). It’s even possible to use the iCloud versions of these apps for collaboration, but with some limitations (notably that Pages documents with tracked changes can only be viewed, not edited, in iCloud).
Invite Collaborators
Once you have a document you want to share, the first step is to invite your collaborators. Choose Share > Collaborate with Others, or click the Collaborate button in the toolbar.
The document must be stored in iCloud Drive (or the Box file sharing service), and the iWork apps will automatically move the file there if need be. To find the file later, choose Go > iCloud Drive in the Finder and look in the folder associated with the app you’re using.
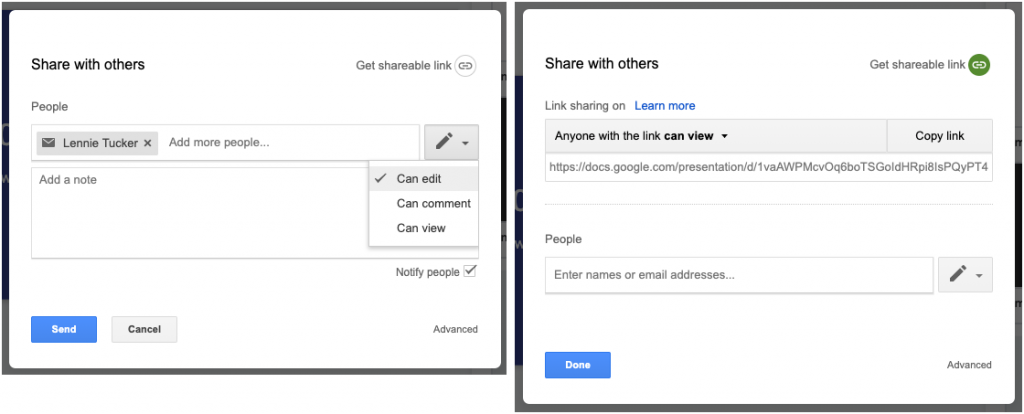
Next, the app displays the Add People dialog, where you can choose with whom you’re going to share the document, how to send the invitation, and what permissions to set.
The Share Options are important. First, you can limit access to “Only people you invite” or “Anyone with the link.” With the former, the invitees must have iCloud accounts and be signed in. With the latter, you can share with anyone, even if they don’t use Apple devices.
Second, with the Permission menu, you can let collaborators make changes, or if you want them just to see the document, you can restrict them to View Only.
When you’re done, click Share to send the iCloud link via the specified channel (or copy it to the clipboard for sending in whatever way you prefer).
Accept an Invitation
When the recipient clicks the link or clicks Accept in a sharing notification, they get a dialog asking to open the document and telling them where it’s stored, in case they don’t want to work on it right away.
When they open the document, it will look and feel exactly like a normal document in Pages, Numbers, or Keynote.
For someone who isn’t an Apple user, clicking the iCloud URL will open the document in the Web version of the appropriate app on iCloud.com. They’ll need to enter a name to identify them in the document, after which they can work in the Web app.
Add and Change Data
For the most part, you can do anything in a shared document that you can do with a normal document. There a few general limitations, such as managing styles and working with media files over 50 MB, plus some app-specific restrictions, such as working with tables of contents in Pages, transposing tables in Numbers, and changing themes in Keynote. Apple has a full list.
While you’re working, you can see who else is in the document at the same time by clicking the Collaborate button and looking for a colored dot next to a person’s name.
You’ll see color-coded cursors, text, and object selections as other people work, but if that’s distracting, choose View > Hide Collaboration Activity.
It can be hard to be work in a document while seeing someone else making changes, so don’t be shy about hiding collaboration activity. Or, if you are actively working with someone on a particular part of the document, consider doing so while you can talk in person or on the phone.
Add Comments
Commenting is the big win for collaboration with remote colleagues—it can save a vast amount of time to discuss a particular aspect of a document in context. To add a comment, select some text or an object, and then choose Insert > Comment or click the Comment button on the toolbar. (The controls look a bit different in iOS; Apple explains the differences.)
Comments appear as color-coded selections, boxes, or in the case of Numbers, corner triangles in cells. If they’re in the way, you can hide them by choosing View > Comments > Hide Comments. Other commands in View > Comments let you easily navigate to next and previous comments so you don’t have to find them visually.
Other collaborators can click Reply to continue the conversation right within that comment. You can edit one of your comments at any time by clicking to the right of the timestamp and choosing Edit Comment (or Edit Reply). Once the discussion has been resolved, either the person who started the comment thread or the document owner can delete the comment thread by clicking Delete.
Track Changes
Tracking who made what changes to a document is available only in Pages, and it’s hugely helpful when you need editing. Only the document owner can enable the feature by choosing Edit > Track Changes, but once that’s done, the change tracking toolbar appears above the document with controls for navigating between comments and changes, buttons for accepting or rejecting changes, and a button for pausing change tracking. A pop-up menu at the right side lets you configure whether you want to see all changes, changes other than deletions (which is generally the best setting), or what the document will look like in the end. A left-hand sidebar lists all comments and changes—show it by choosing View > Show Comments & Changes Pane.
Anyone with edit access can accept or reject any particular change by clicking Accept or Reject in the Comments & Changes pane; you can also use the buttons in the change tracking toolbar to navigate from change to change, accepting and rejecting as you go. If there’s no need to deal with each change individually, use the pop-up menu’s commands to accept or reject all changes.
Needless to say, you can work on shared documents only when you’re online when you’re using the Mac or iOS version of an iWork app (if you try to edit while offline, the app will only let you edit a copy that is no longer shared). With any iCloud.com documents that you already have open, however, you can work offline, but your changes won’t appear to others until you reconnect.
When you’re done collaborating on a document, click the Collaborate button in the toolbar and then Stop Sharing (below left). Doing so immediately prevents others from making more changes and deletes the document from iCloud Drive on their devices (below right).
Simultaneous collaboration is wonderful when you’re working intensely with other people to develop a presentation, brainstorm budget estimates, or wordsmith a mission statement. In such situations, you’ll want to be able to talk at the same time. But for other sorts of projects, it’s also useful to allow people to collaborate when it’s convenient for them—the important thing is that everyone is working in the same document and can see each other’s changes and comments. If you rely on Apple’s iWork app for word processing, spreadsheets, or presentations, give their collaboration features a try!
Social Media: Did you know that you can use Apple’s Pages, Numbers, and Keynote to work on documents collaboratively with others, even if they don’t use Apple devices? Read on for how to get started with the collaboration features of these apps.